Auto-Remediation
This guide walks you through configuring automated remediation rules in AccessHive. Auto-remediation detects identity governance violations – like drift, stale access, or failed verifications – and responds automatically by notifying your team or revoking access.
Time to complete: About 10 minutes.
- You need the Admin role.
- Governance policies should be configured so the system knows what to evaluate. See Governance.
- Identities must exist and be in use for remediation rules to have something to act on. See Creating Identities.
Navigate to Settings > Auto-Remediation to open the configuration page.
How auto-remediation works
AccessHive continuously evaluates your identities against governance policies. When a violation is detected, the matching remediation rule determines the response: notify the identity owner, automatically revoke access, or both.
Each rule type targets a specific kind of violation. You configure the remediation mode and notification settings for each one independently.
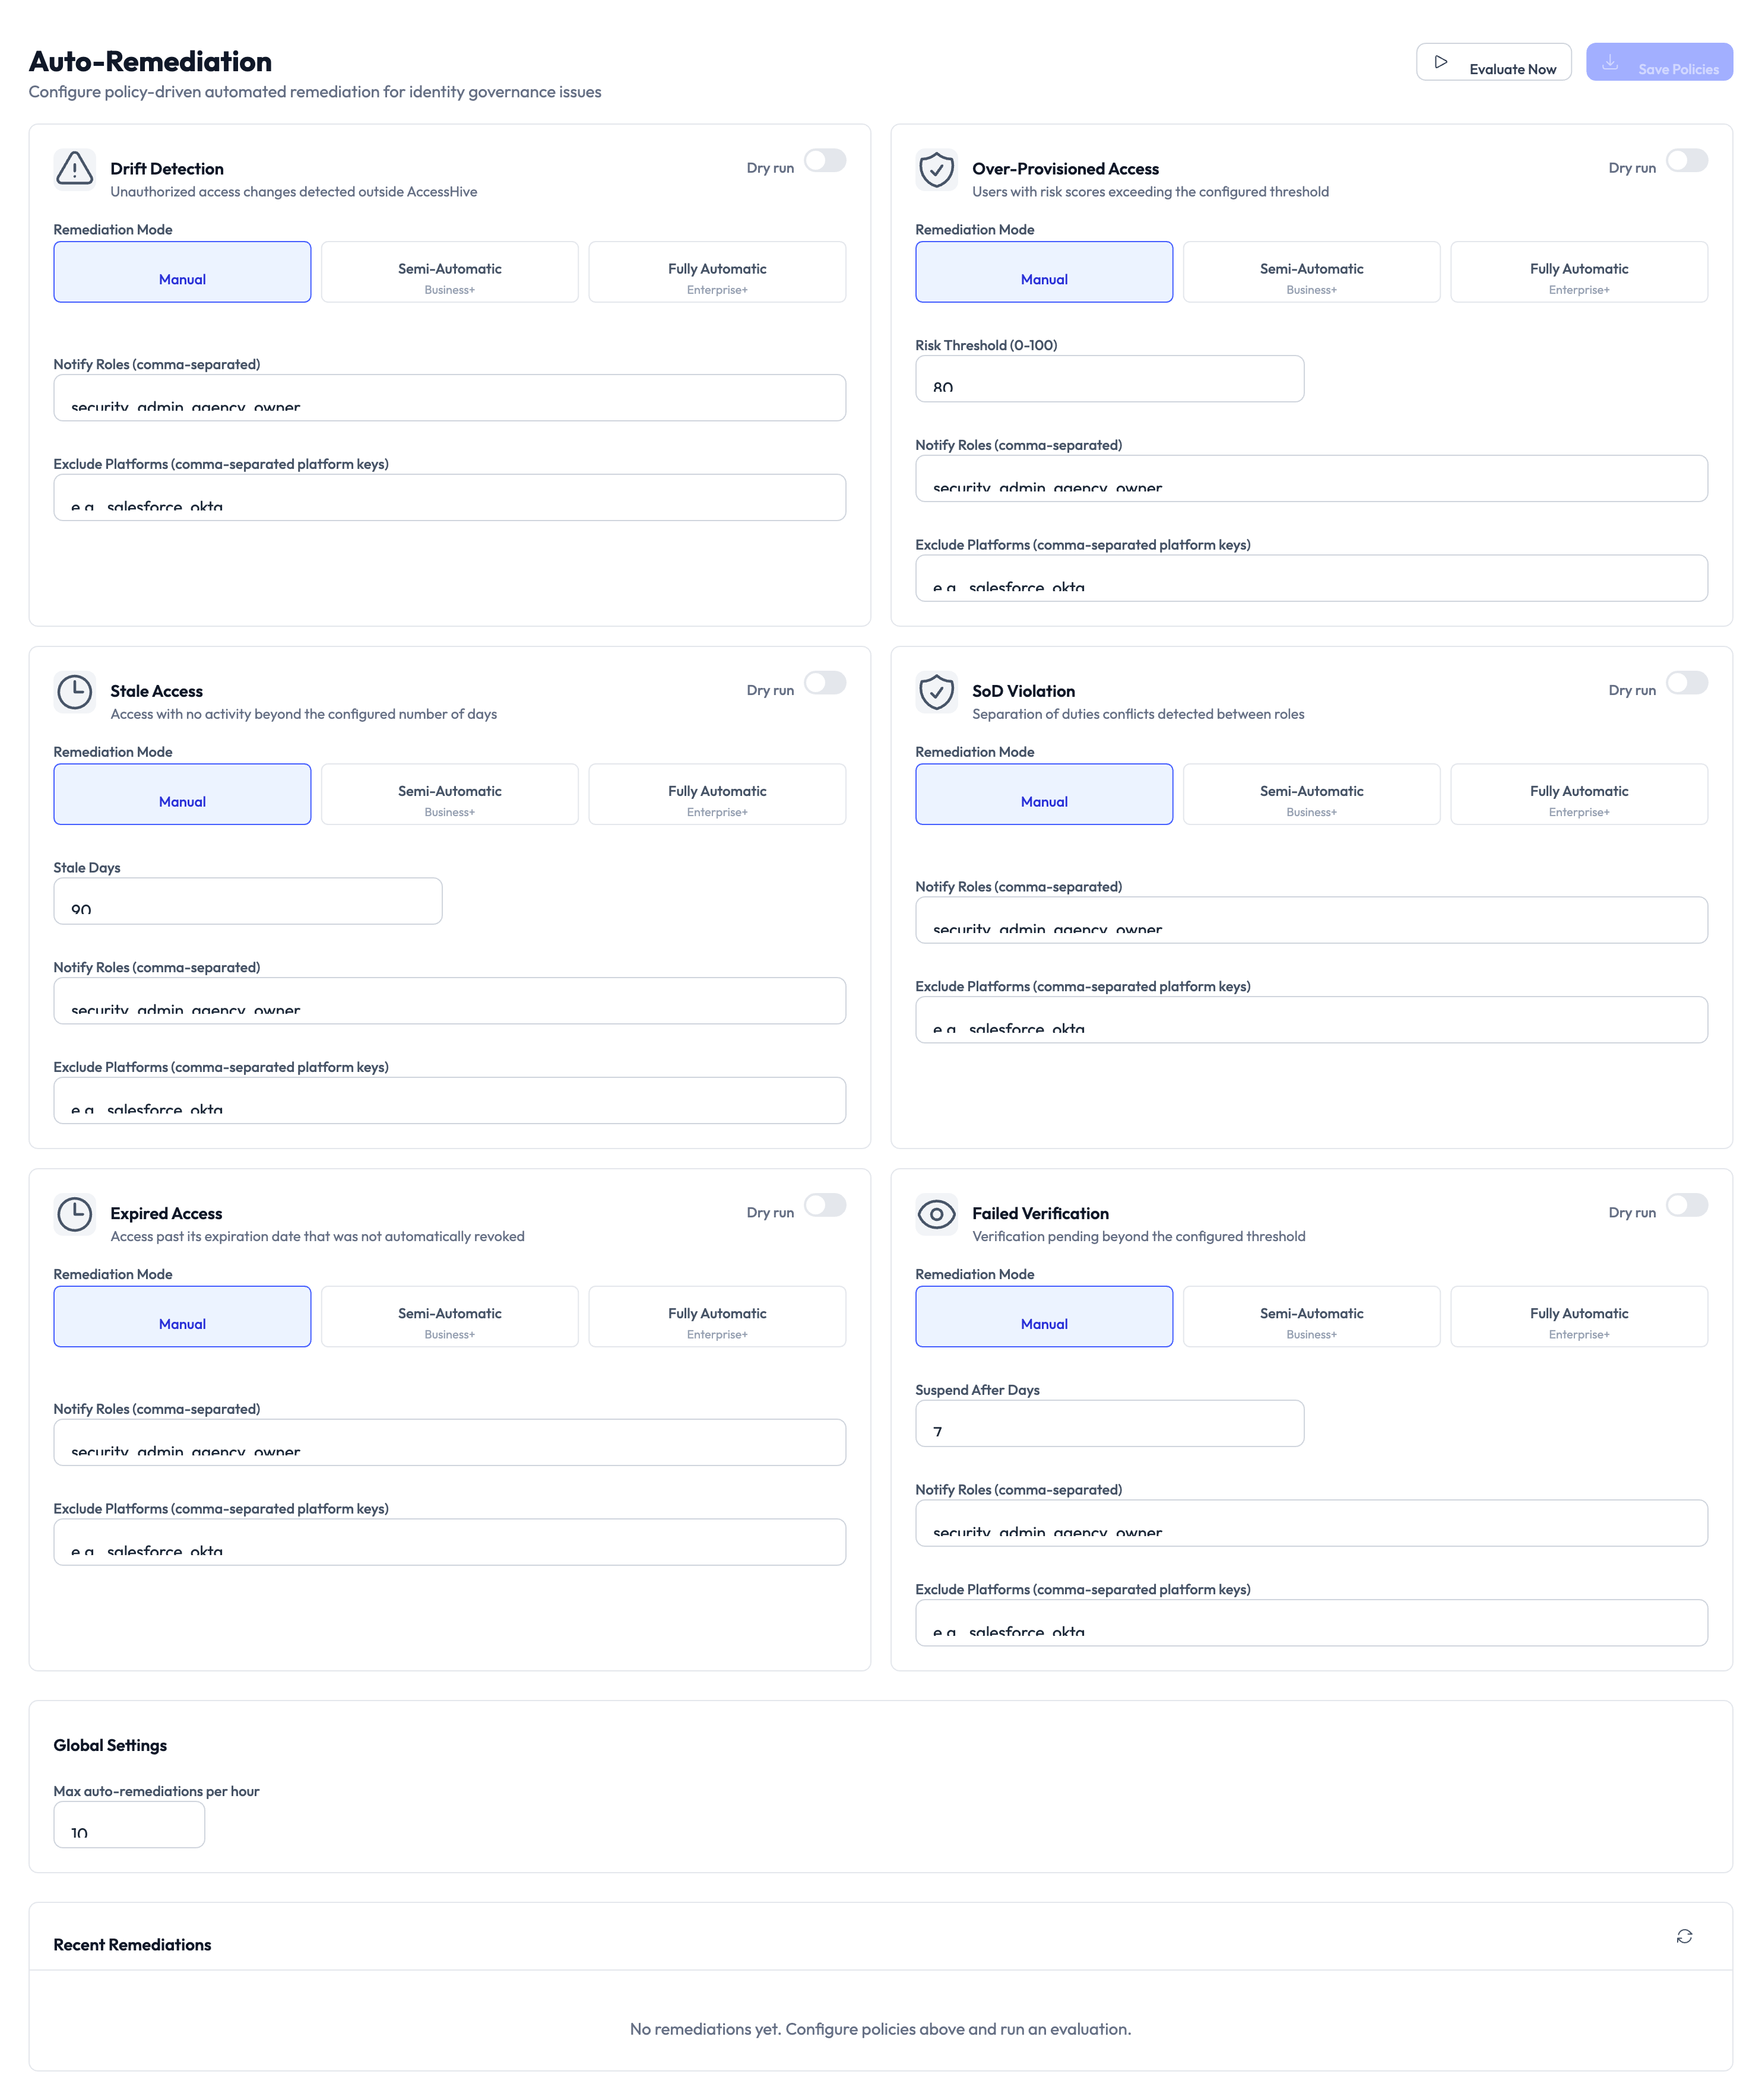
Rule types
The page shows six rule cards. Each targets a different violation type.
| Rule | What it detects | Example |
|---|---|---|
| Drift Detection | Unauthorized access changes detected outside AccessHive | Someone manually changed permissions in the platform |
| Over-Provisioned Access | Users with role access exceeding the configured threshold | A user has admin access to 15 platforms when they only need 3 |
| Stale Access | Identities with no activity beyond the configured number of days | A credential that has not been checked out in 90 days |
| Separation of Duties (SoD) Violation | Users with conflicting roles that violate SoD policies | One person holds both “approver” and “requester” roles |
| Expired Access | Access grants past their expiration date that were not automatically revoked | A time-bound access window ended but credentials remain active |
| Failed Verification | Identities that failed a scheduled verification check | A credential rotation check that could not complete |
Configure a remediation rule
Each rule card has the same set of options. Repeat these steps for each rule you want to enable.
Step 1 — Choose a remediation mode
Each rule offers three modes:
| Mode | What happens |
|---|---|
| Manual | The system flags the violation but takes no action. Your team reviews and resolves it. |
| Semi-Automatic | The system notifies the configured roles and waits for approval before remediating. |
| Fully Automatic | The system remediates immediately without waiting for approval. |
Select the mode that matches your team’s risk tolerance. Start with Manual or Semi-Automatic while you learn what triggers each rule.
Manual mode lets you observe which violations the system detects without any automatic action. Once you trust the detection accuracy, switch to Semi-Automatic or Fully Automatic.
Step 2 — Set rule-specific thresholds
Some rules have additional settings:
- Drift Detection — No threshold. Triggers whenever an unauthorized change is detected.
- Over-Provisioned Access — Set the Exit Threshold to define how many role assignments count as over-provisioned.
- Stale Access — Set the Stale Days to define how many inactive days trigger the rule.
- SoD Violation — Triggers based on your configured Separation of Duties policies.
- Expired Access — Triggers for any access grant past its expiration that was not automatically cleaned up.
- Failed Verification — Set the Expired After Days to define how long after a failed check the rule triggers.
Step 3 — Configure notifications
In the Notify Roles field, enter the roles that should be notified when this rule triggers. Separate multiple roles with commas. Common choices include admin, security manager, and identity owner.
Step 4 — Exclude platforms (optional)
Use the Exclude Platforms field to skip specific platforms for this rule. Enter platform names separated by commas. This is useful when a platform has its own access governance and you do not want duplicate remediation.
Adjust global settings
Step 5 — Set the rate limit
At the bottom of the page, the Global Settings section includes the Max auto-remediations per hour field. This caps how many automatic actions the system takes in a rolling hour to prevent runaway revocations.
A low rate limit protects against mass revocations if a policy change suddenly flags many identities. Start with a conservative number and increase it once you are confident in your rule configuration.
Step 6 — Save and enable
Toggle each rule card to On using the toggle in the card header. Click Evaluate Now at the top of the page to run an immediate evaluation against all active identities. Otherwise, rules are evaluated on the system’s regular schedule.
Review recent remediations
The Recent Remediations section at the bottom of the page shows the latest actions taken by the system. Use this to verify rules are triggering correctly and to spot any unexpected remediations.
Something went wrong?
A rule is triggering too often
Review the threshold settings for that rule. For Stale Access, increase the number of inactive days. For Over-Provisioned Access, raise the exit threshold. You can also exclude noisy platforms from the rule.
Fully Automatic mode revoked access unexpectedly
Check the Recent Remediations section to see which rule triggered the revocation. Switch the rule to Semi-Automatic or Manual mode while you investigate. Review the governance policies that feed into that rule. See Governance.
Evaluate Now shows no results
The system only flags violations that match your configured thresholds. If no identities currently violate any rules, the evaluation returns clean results. Verify your thresholds are set correctly and that identities are in active use.
Notifications are not being sent
Verify that the Notify Roles field has at least one role entered. Check that users with those roles have valid email addresses in their profiles. See Troubleshooting.
What’s next?
- Configure time-bound access — Set expiration rules that feed into the Expired Access remediation rule. See Time-Bound Access.
- Connect a SIEM tool — Forward remediation events to your security monitoring system. See SIEM Integration.
- Review the audit trail — Track all remediation actions taken by the system. See Audit Trail.
- Generate reports — Create compliance reports showing remediation activity. See Reports.