Creating Identities
This guide walks you through creating a new identity in AccessHive using the step-by-step wizard. An identity represents a set of credentials — a login, API key, or service account — that your team uses to access a client’s platform.
Time to complete: About 2 minutes.
- At least one platform must be added and in Operational state. See Platform Connections.
- To create managed Shared Credentials, your Google Workspace identity source must be connected. See Google Workspace Setup.
- You need the Admin or Identity Manager role.
Navigate to Identities → Add Identity to launch the wizard.
Which identity type should I choose?
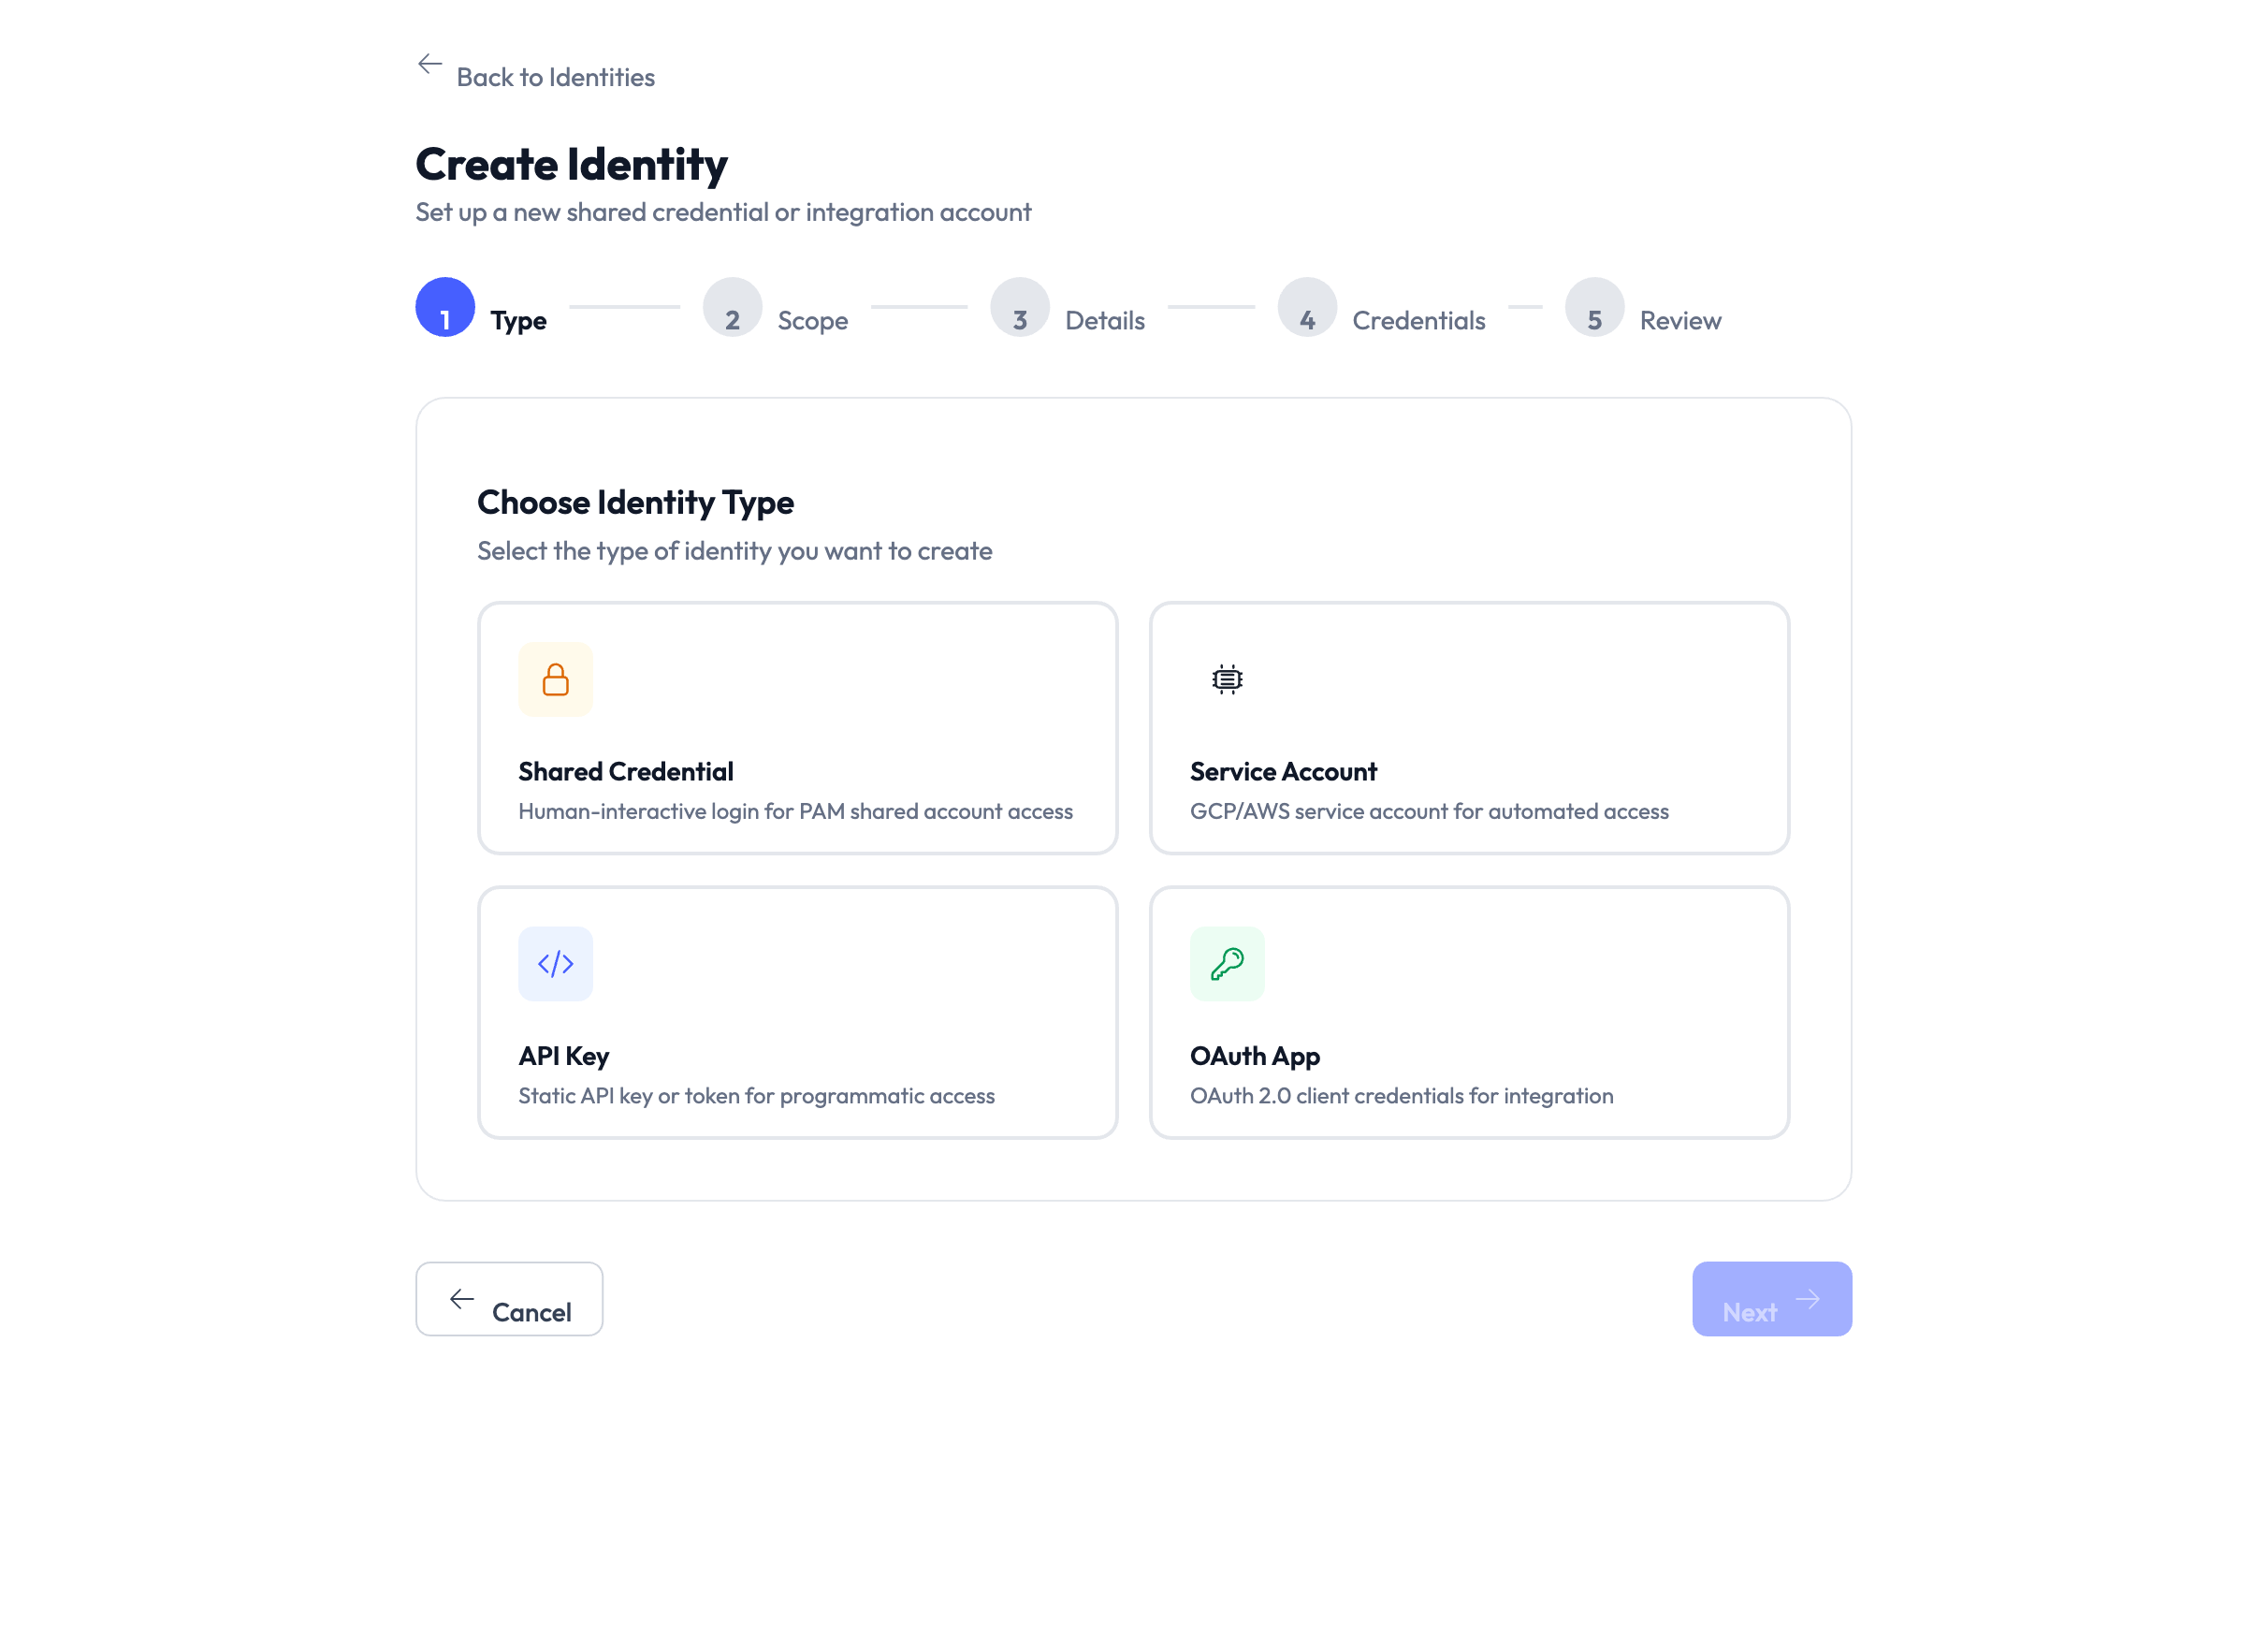
The wizard supports four identity types. Each one is designed for a different way of authenticating with a platform.
| If you need to… | Choose | Example |
|---|---|---|
| Share a username/password login across your team | Shared Credential | A Meta Business login used by 3 team members, with password rotation on check-in |
| Connect a machine account using a JSON key file | Service Account | A GCP service account pulling GA4 reporting data |
| Store a static API key or token | API Key | A Klaviyo API key for email automation |
| Register OAuth 2.0 client credentials | OAuth App | An OAuth client for a custom analytics dashboard |
Shared Credential (external mode) is the most flexible option for human-operated accounts. You provide a username and password, and the system stores them securely in the credential vault with checkout governance.
Human Interactive identities are created automatically when Google Workspace provisions a domain user through the SSO flow. You cannot create them manually in the wizard. For details, see Identity Types.
For a deeper explanation of each type, see the Identity Types concept page.
The wizard: step by step
Step 1 — Choose identity type
Select one of the four identity types from the grid. Each card shows a short description to help you decide.
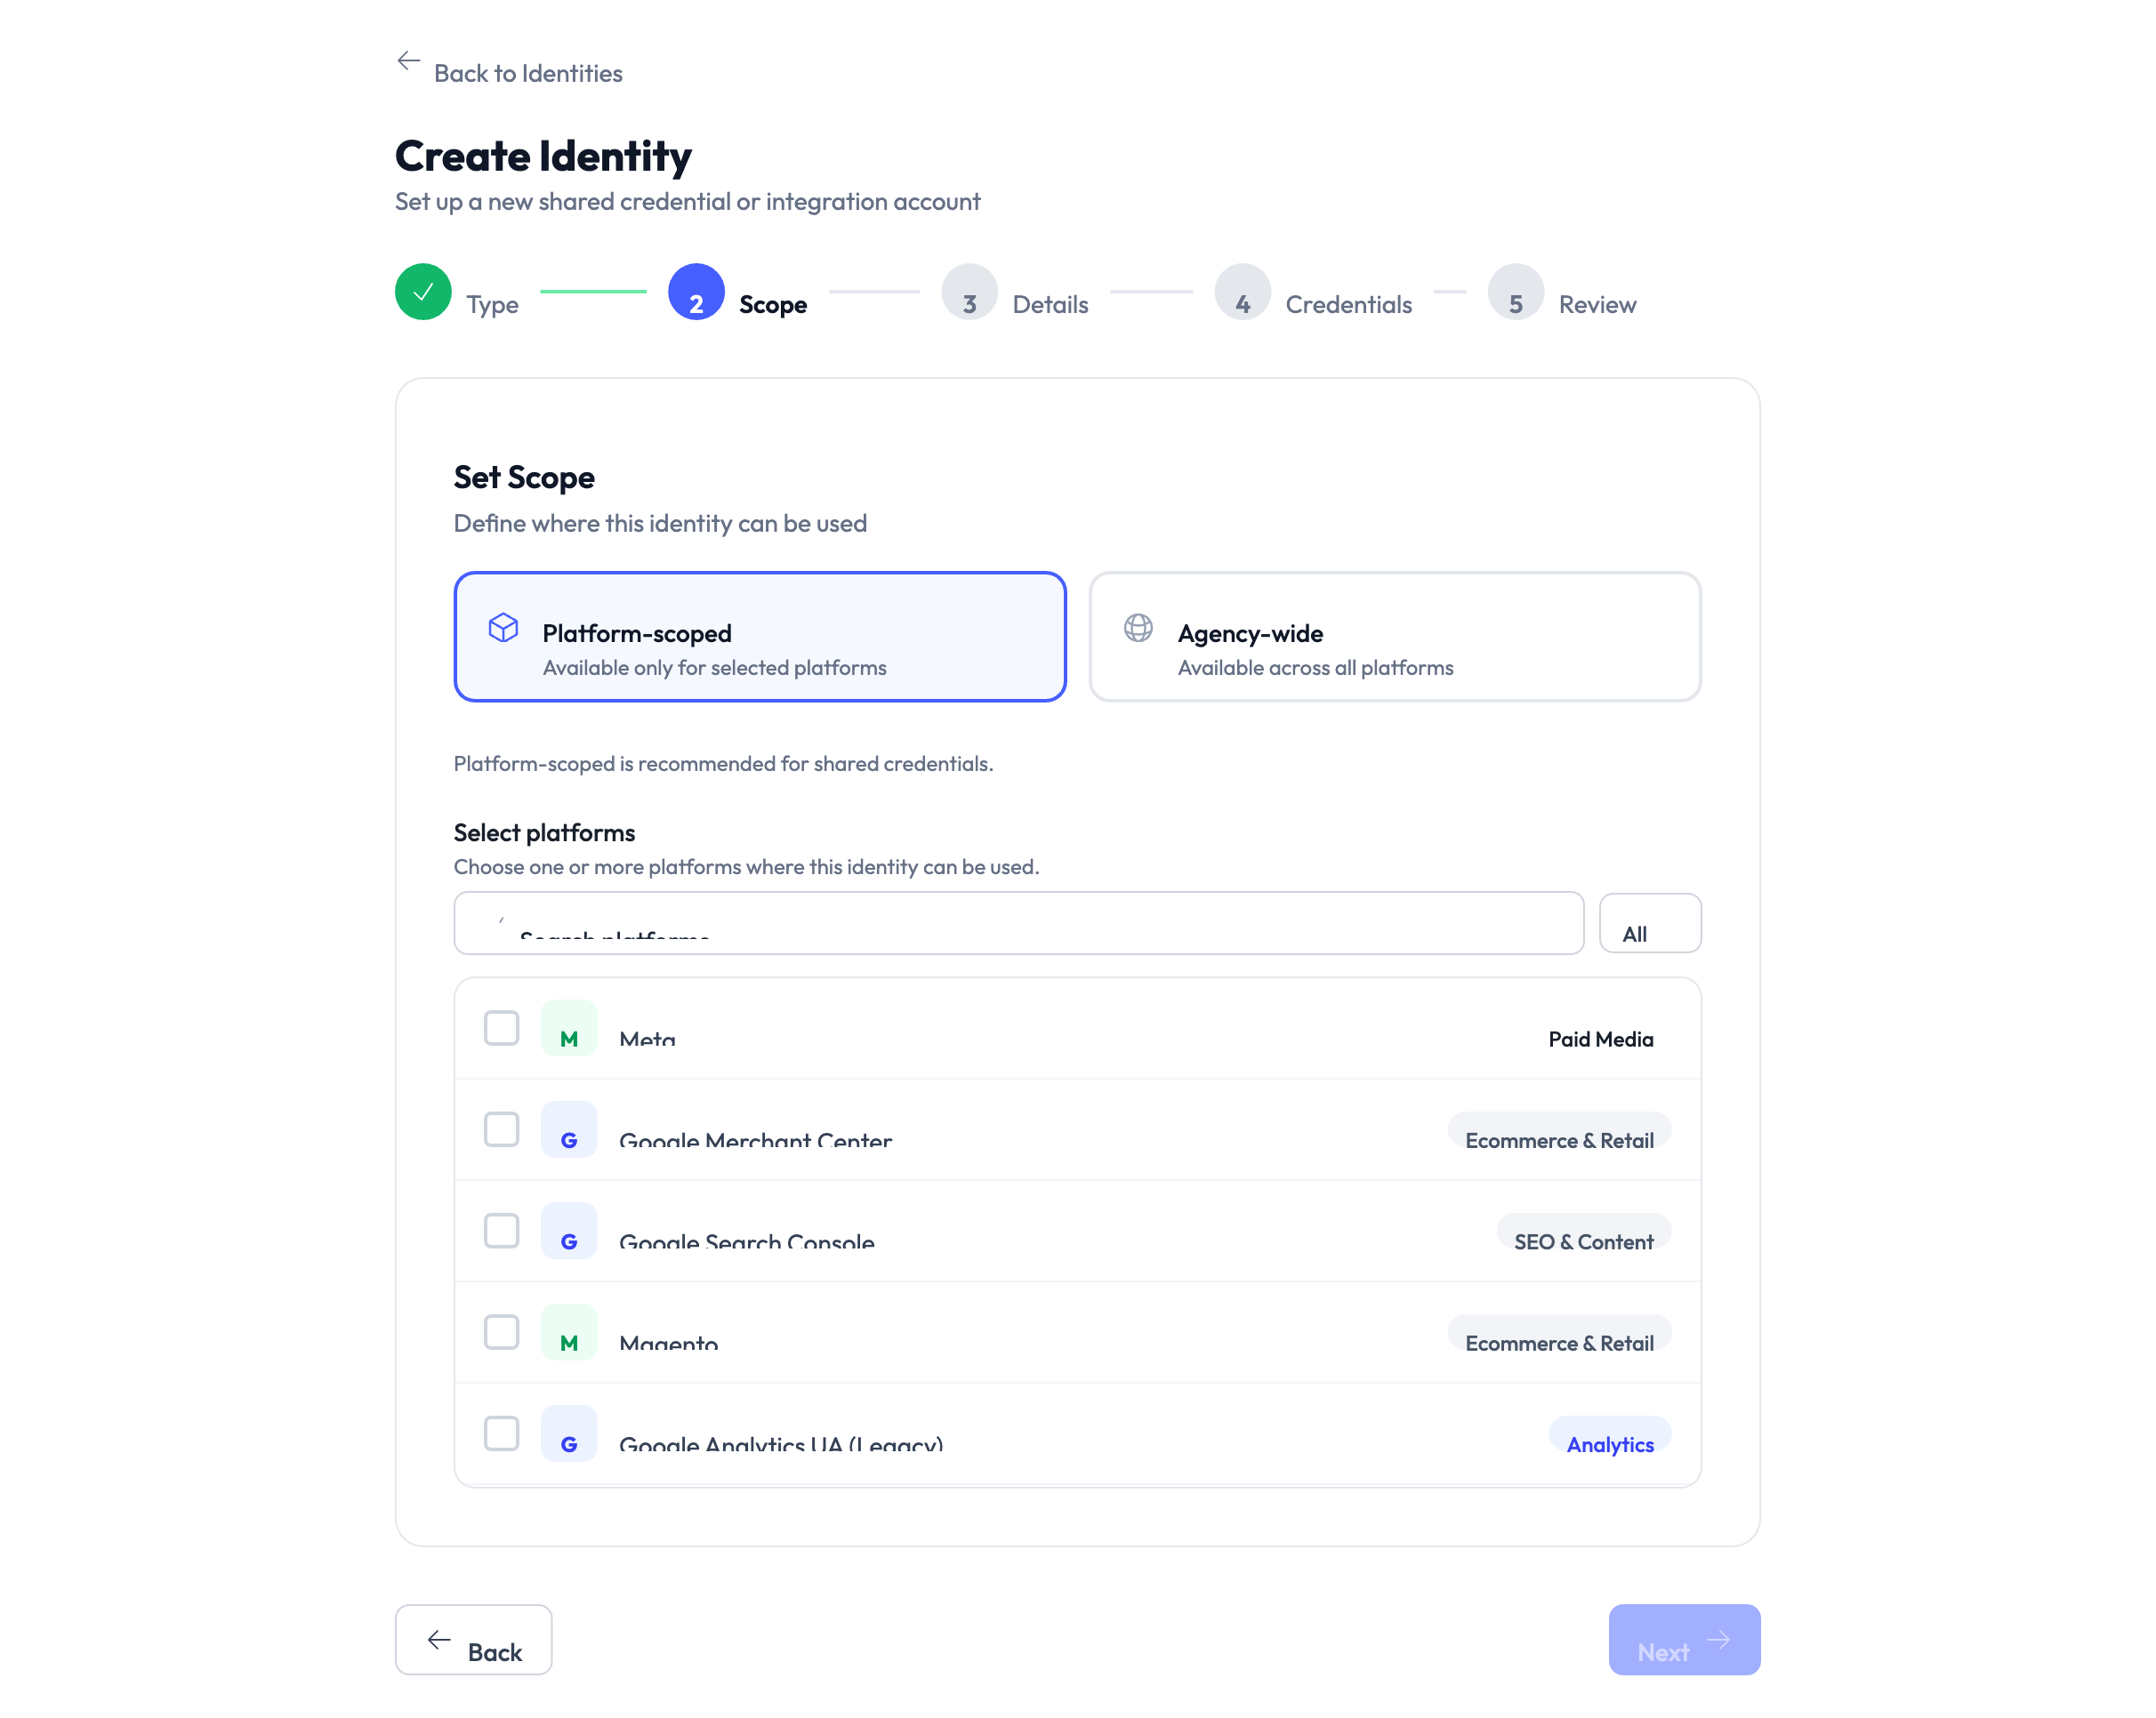
Step 2 — Set scope
Define where this identity can be used:
- Platform-specific (recommended) — Restricts the identity to one platform. Best for most use cases.
- Agency-wide — Allows the identity across all compatible platforms. Only available for Shared Credential and Service Account.
These types are tied to a single platform’s authentication system, so the agency-wide option is not available.
Step 3 — Identity details
Provide a display name, optional description, purpose, and owner for the identity. If you chose platform-specific scope, select the target platform from the grid.

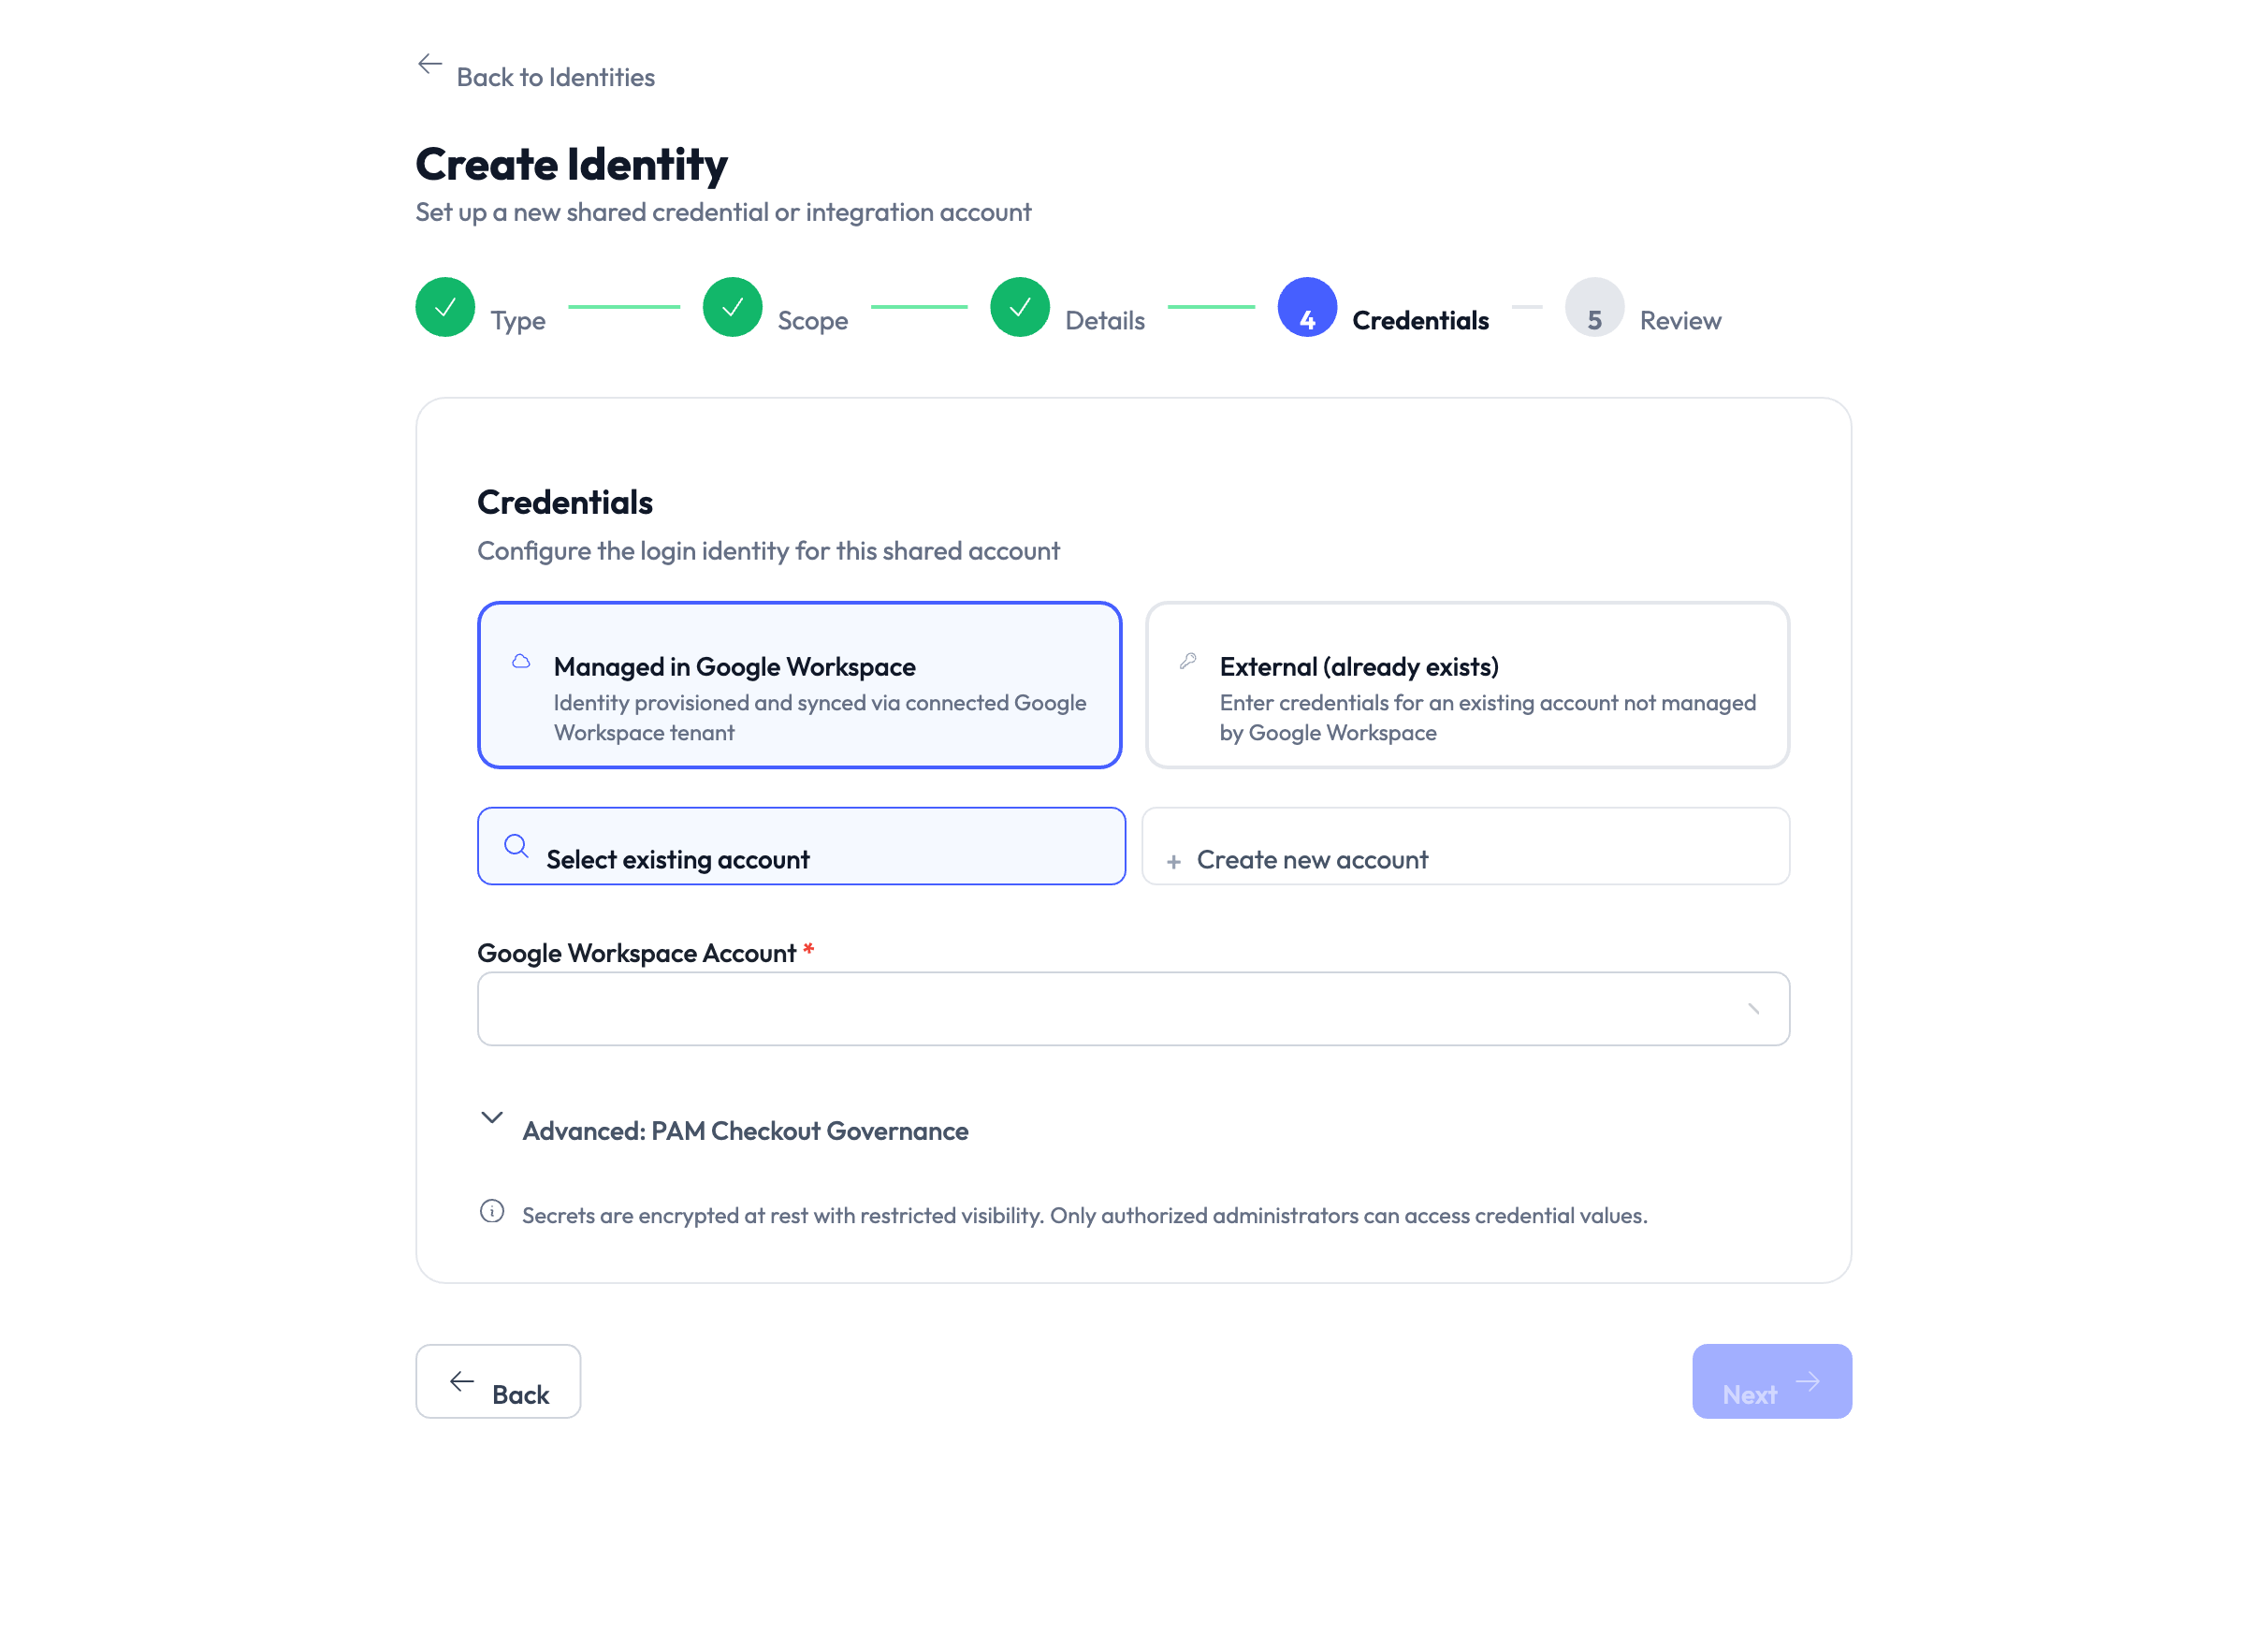
Step 4 — Credentials
This step changes depending on the identity type you selected in Step 1.
Choose how the credentials are managed:
- Managed in Google Workspace — The system automatically creates a domain user (e.g.,
meta@youragency.com) and sets the password. This option is only available when your Google Workspace identity source is connected. - External — You provide the username and password yourself. Both fields are required.
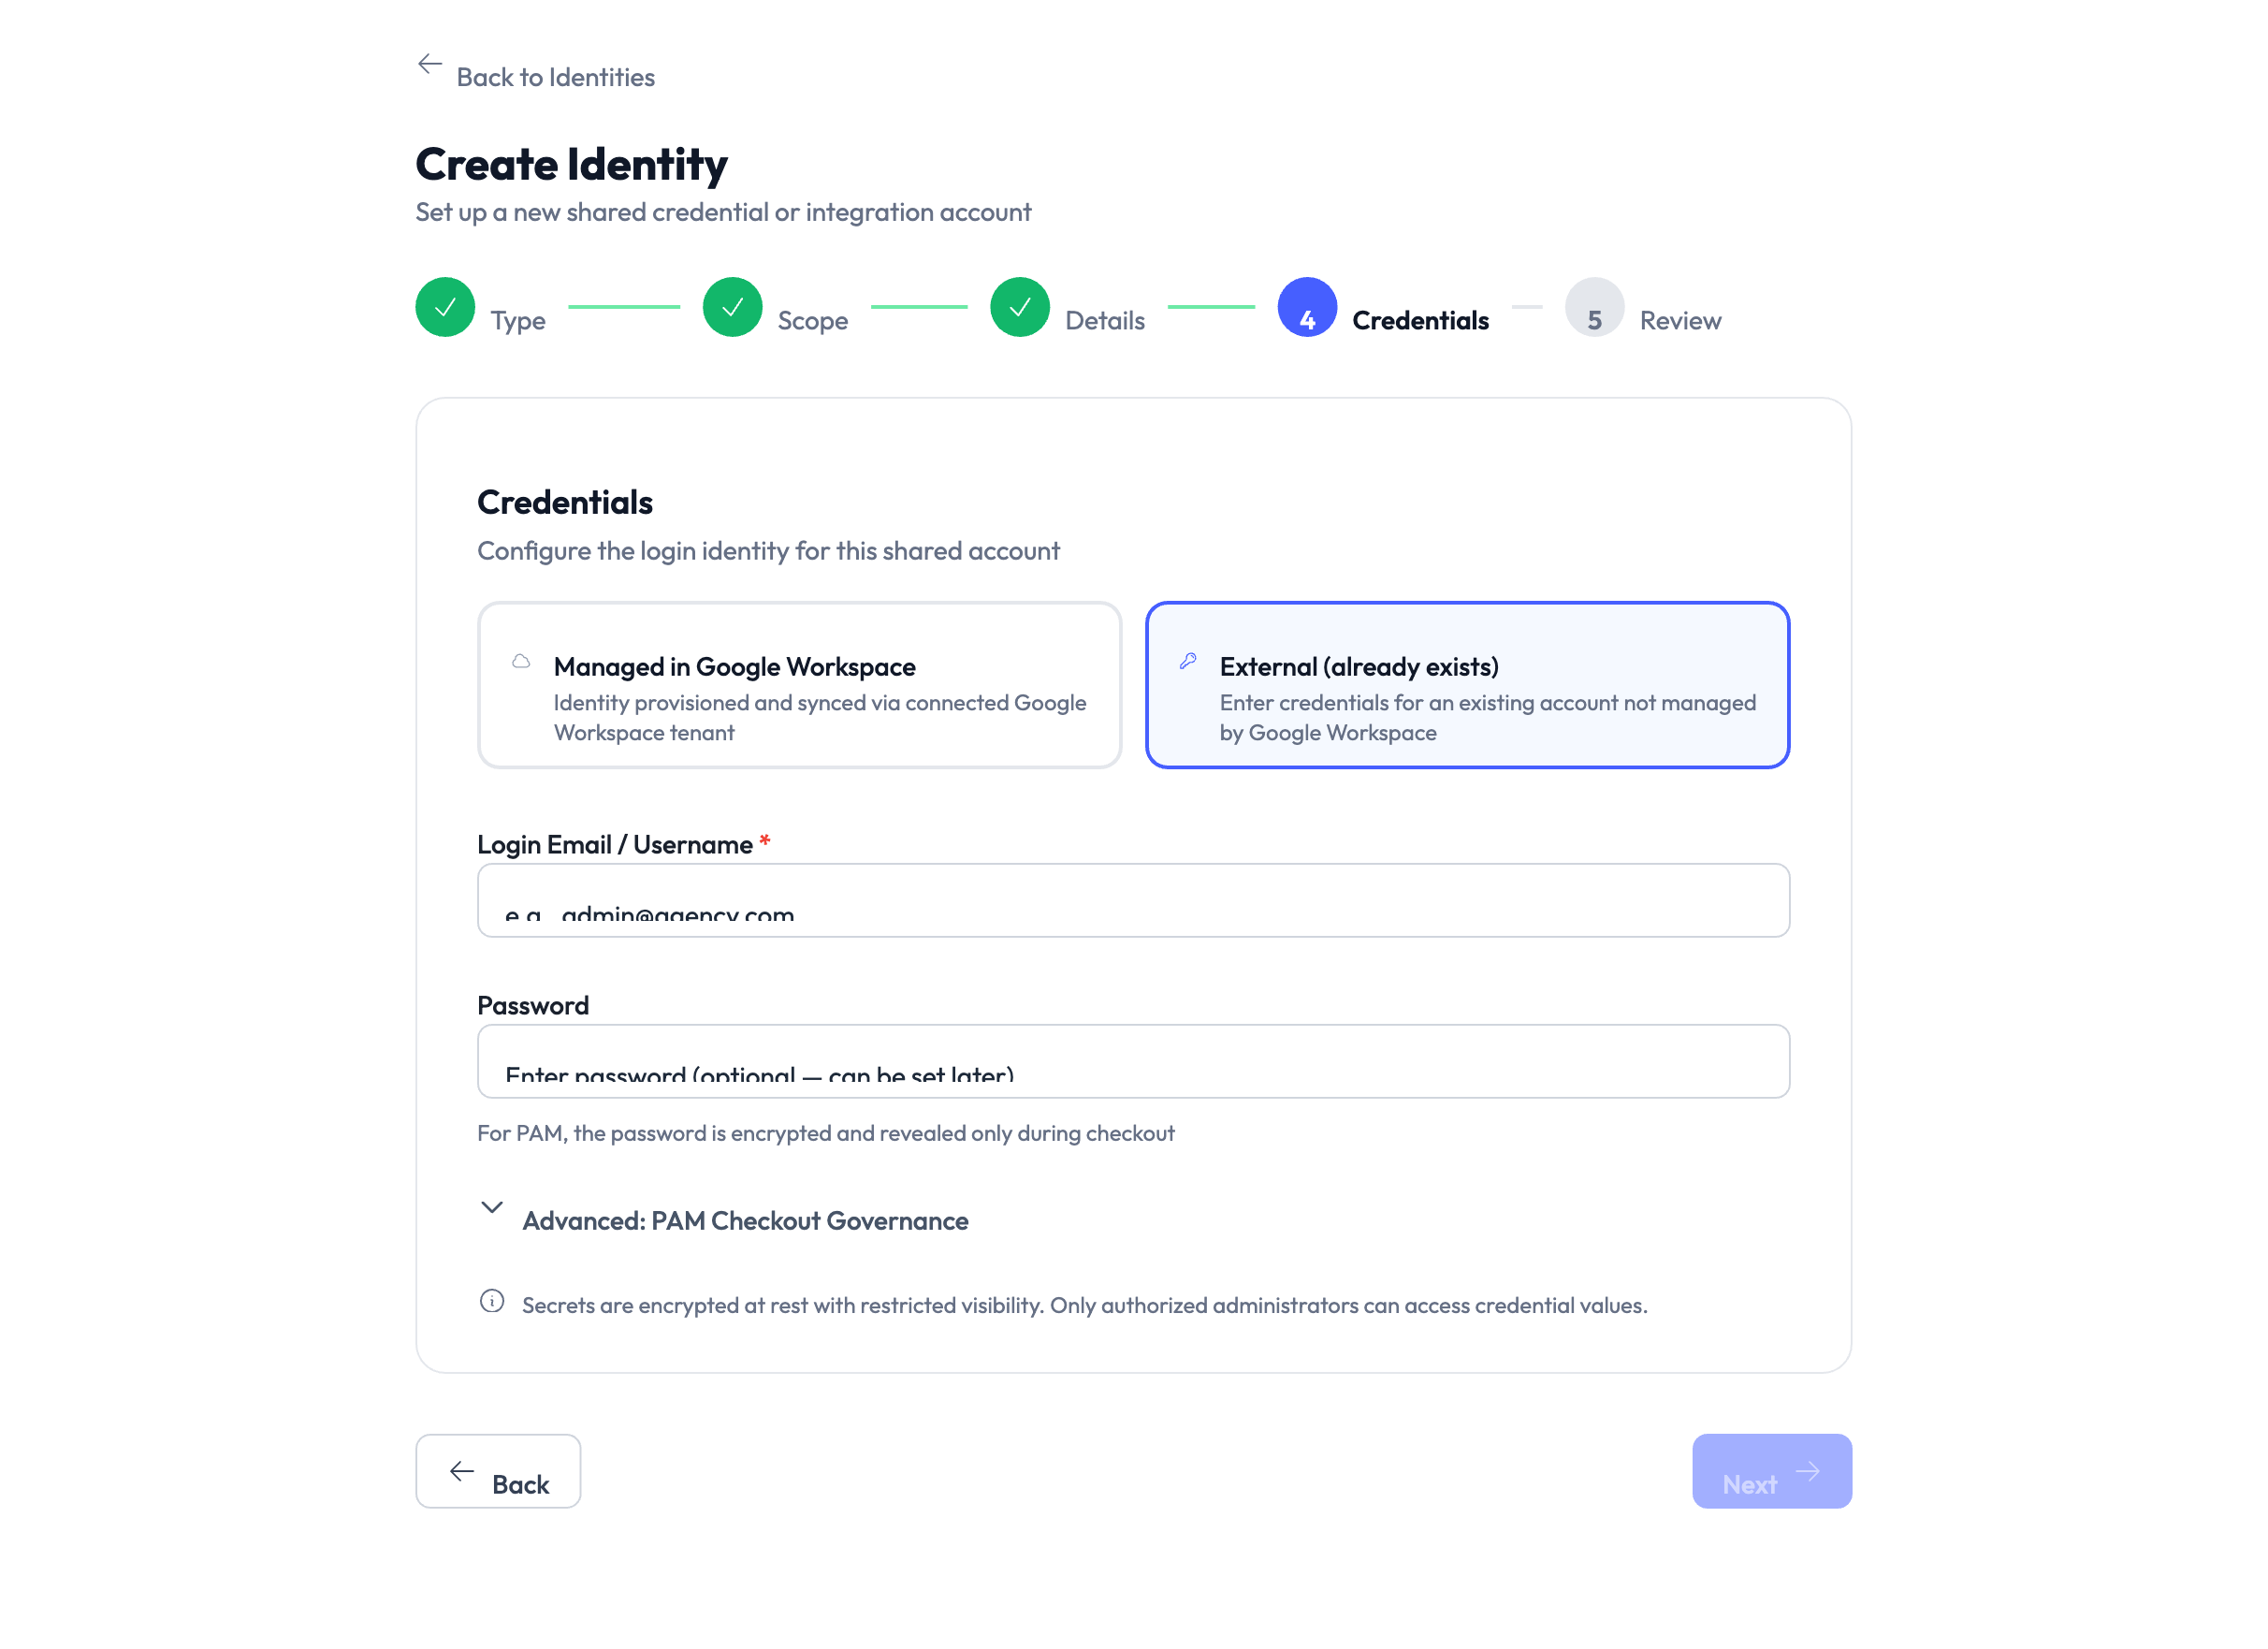
When using external mode, both the username and password fields must be filled in. The system will show an error if either is missing.
Enter the service account email address and upload (or paste) the JSON key file. The key content is encrypted before being stored in the credential vault.
Enter a Key Label (a friendly name to identify this key) and the API Key value. Both fields are required.
Enter the Client ID and Client Secret. Both fields are required.
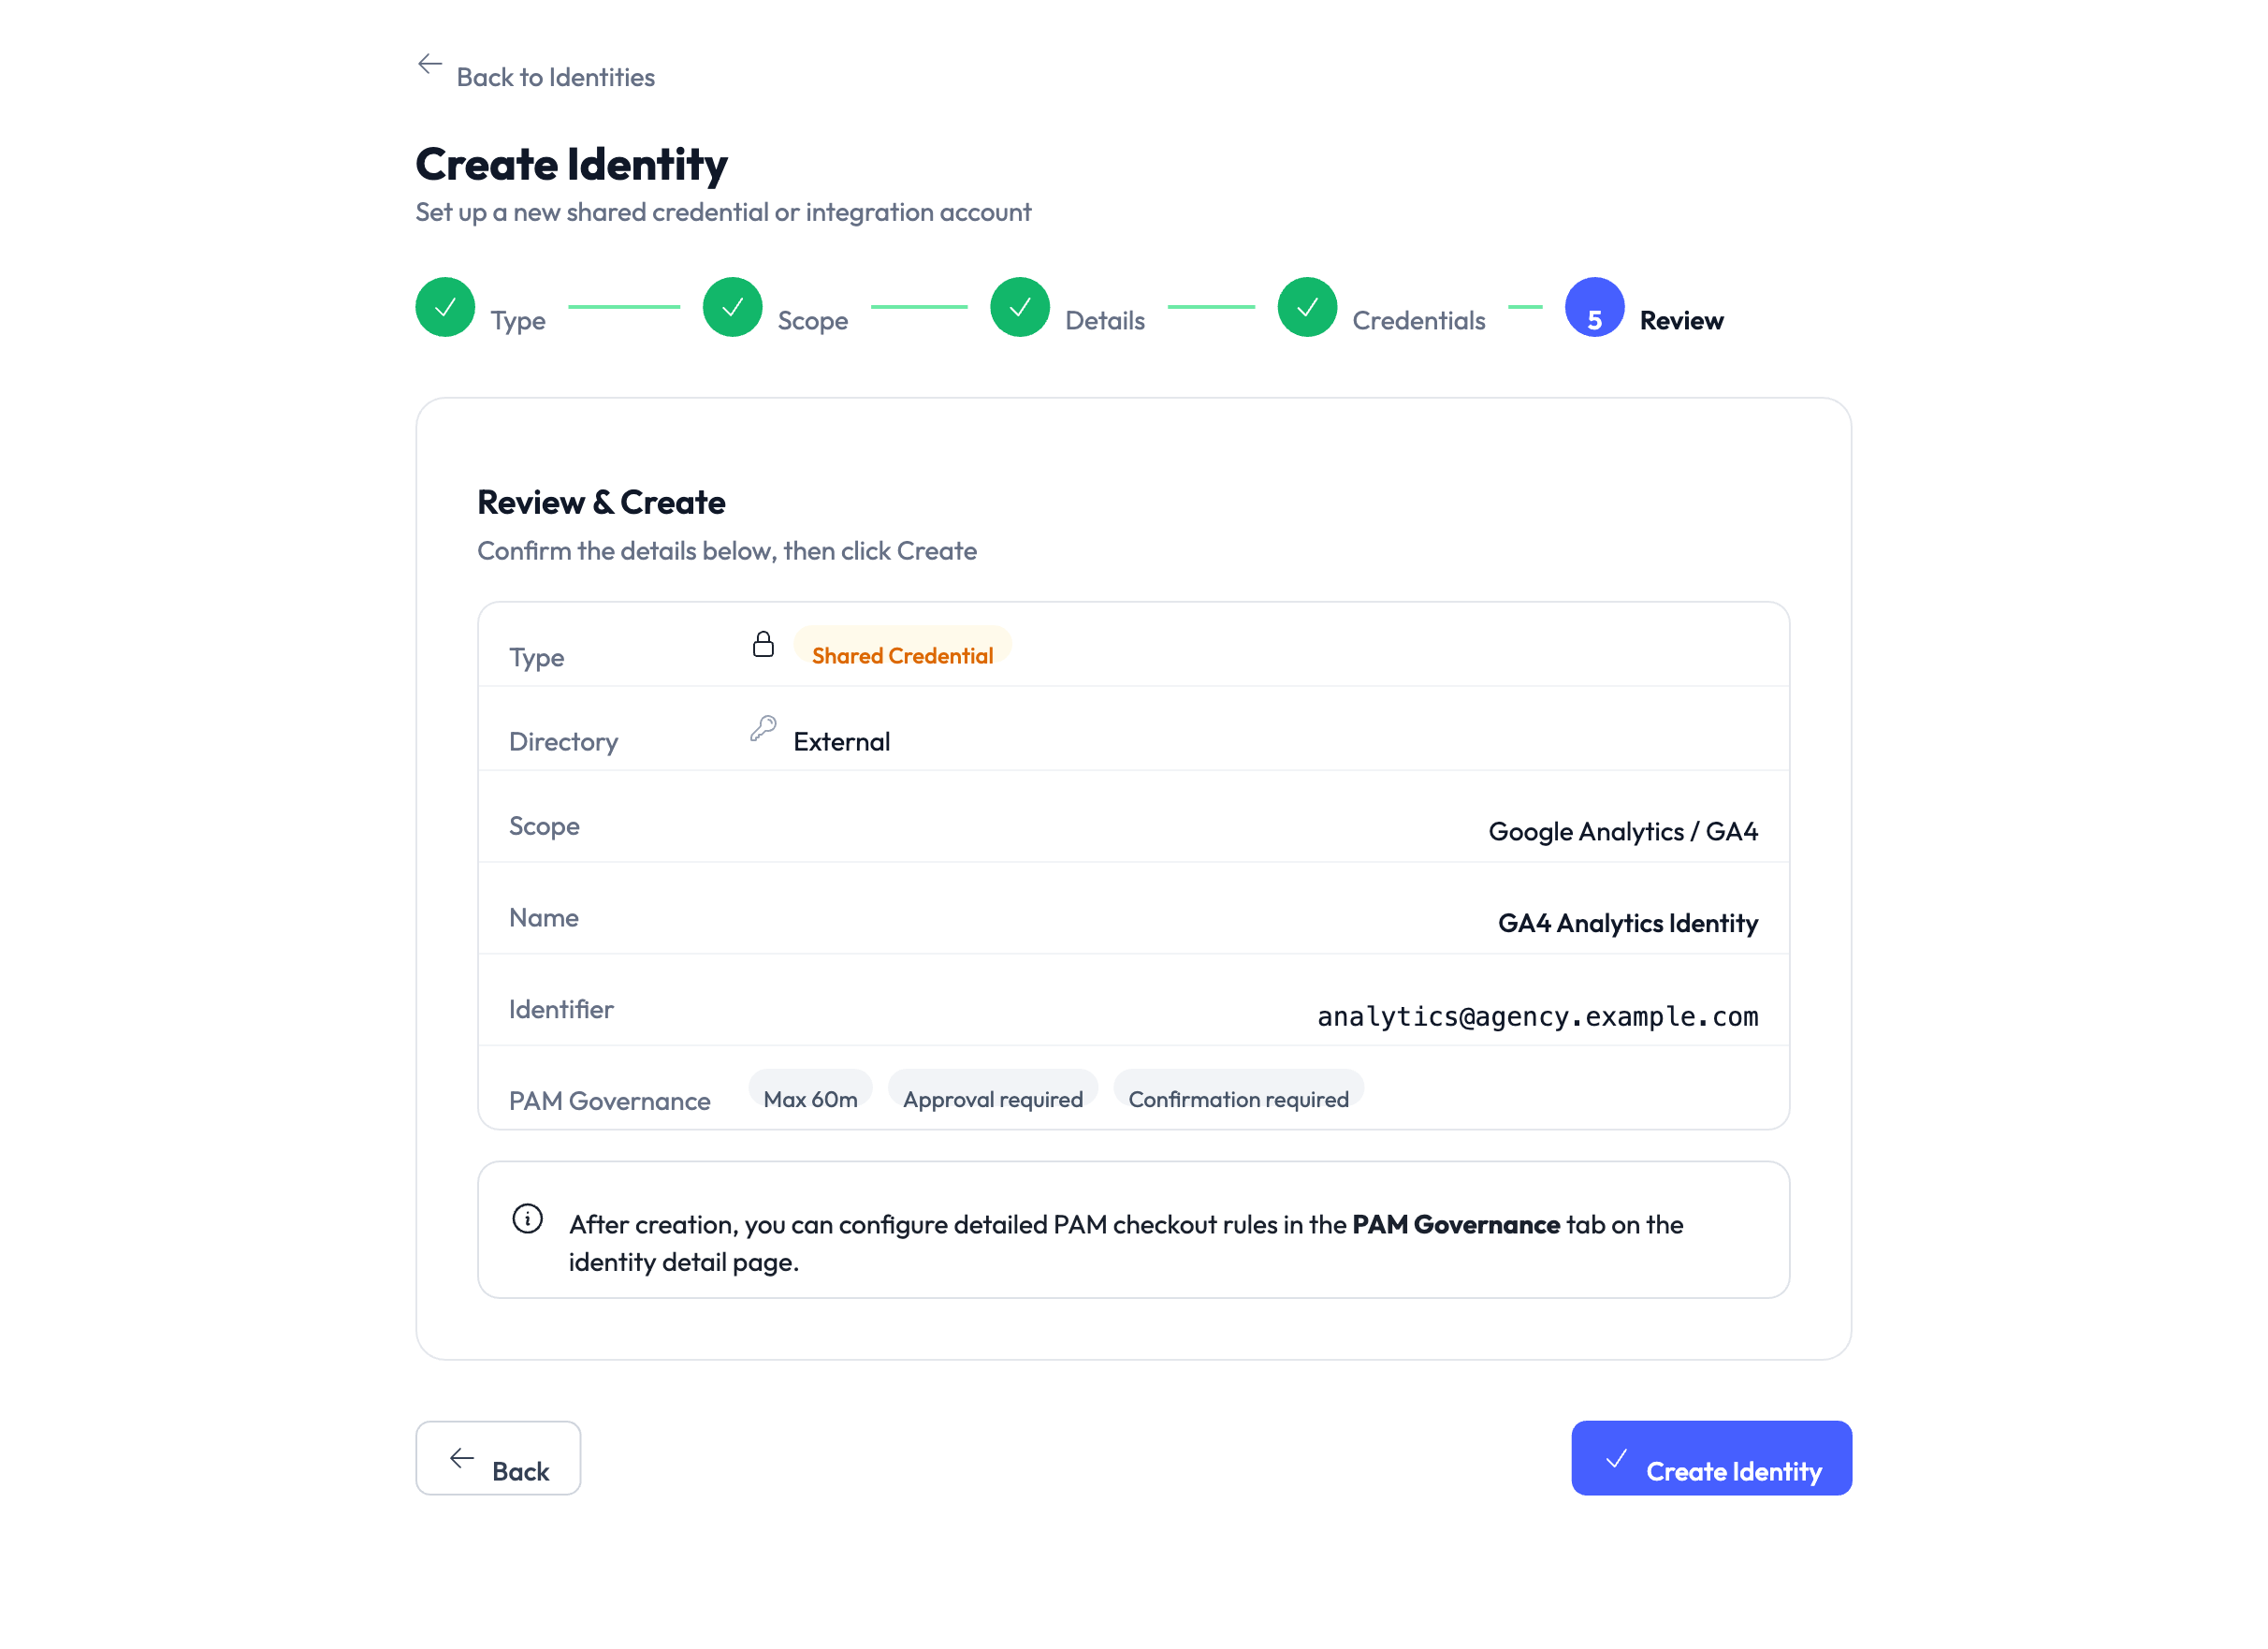
Step 5 — Review and create
The review screen shows all your selections: identity type, scope, name, credentials summary, and governance settings.
Governance settings control how team members check out and use this identity:
- Max checkout time — How long someone can hold the credentials before they’re automatically returned.
- Approval required — Whether a manager must approve each checkout request.
- Confirmation required — Whether the user must confirm they’ve finished before the session ends.
These defaults come from your agency settings and can be adjusted later on the identity detail page.
Click Create to finish. What happens next depends on the identity type:
| Identity type | What happens after you click Create |
|---|---|
| Shared Credential (external) | Credentials are stored immediately. Status: Provisioned. |
| Shared Credential (managed) | A Google Workspace user is created in the background (5–15 seconds). Status: Pending → Provisioned. |
| Service Account | Credentials are stored immediately. Status: Provisioned. |
| API Key | Credentials are stored immediately. Status: Provisioned. |
| OAuth App | Credentials are stored immediately. Status: Provisioned. |
Something went wrong?
The wizard doesn’t show my platform
The platform may not support the identity type you selected, or it’s not in “Operational” state yet. Go to Settings → Platforms and verify the platform is connected and operational. See Troubleshooting.
Identity is stuck at Pending
This usually means the background provisioning job hasn’t finished yet. Check the identity detail page to see which provider (Keycloak or Google Workspace) is still pending. Use the Retry Provisioning button if it’s been more than a minute. See Troubleshooting > Identity stuck at PENDING.
Error: ‘Email domain is not a verified Google Workspace domain’
When creating a managed Shared Credential, the username must use one of your agency’s verified Google Workspace domains. The wizard shows these in a dropdown. If you entered a custom username with a different domain, switch to one of the domains listed. See Google Workspace Setup.
Managed credential option is greyed out
Your Google Workspace identity source is either not connected or not in provisioning mode. Go to Settings → Identity Sources → Google Workspace and verify the connection is active. See Google Workspace Setup.
For more troubleshooting scenarios, see the full Troubleshooting Guide.
What’s next?
- Manage credentials — Learn how to reveal, rotate, and audit credentials. See Managing Credentials.
- Set up PAM sessions — Configure checkout policies, approval workflows, and session time limits. See PAM Sessions.
- Assign to clients — Link identities to specific client accounts. See Client Management.
- Review audit trail — Track who created, modified, or checked out identities. See Audit Trail.