Client Management
This guide covers how to create, manage, and offboard client accounts in AccessHive. Clients represent your agency’s customer accounts – each one has its own platform access, identities, team assignments, and governance policies.
Time to complete: About 5 minutes for creating a client.
- You need the Admin or Client Manager role.
- At least one platform should be connected and in Operational state. See Platform Connections.
- If you plan to assign identities during setup, create them first. See Creating Identities.
Creating a client
Step 1 – Open the new client flow
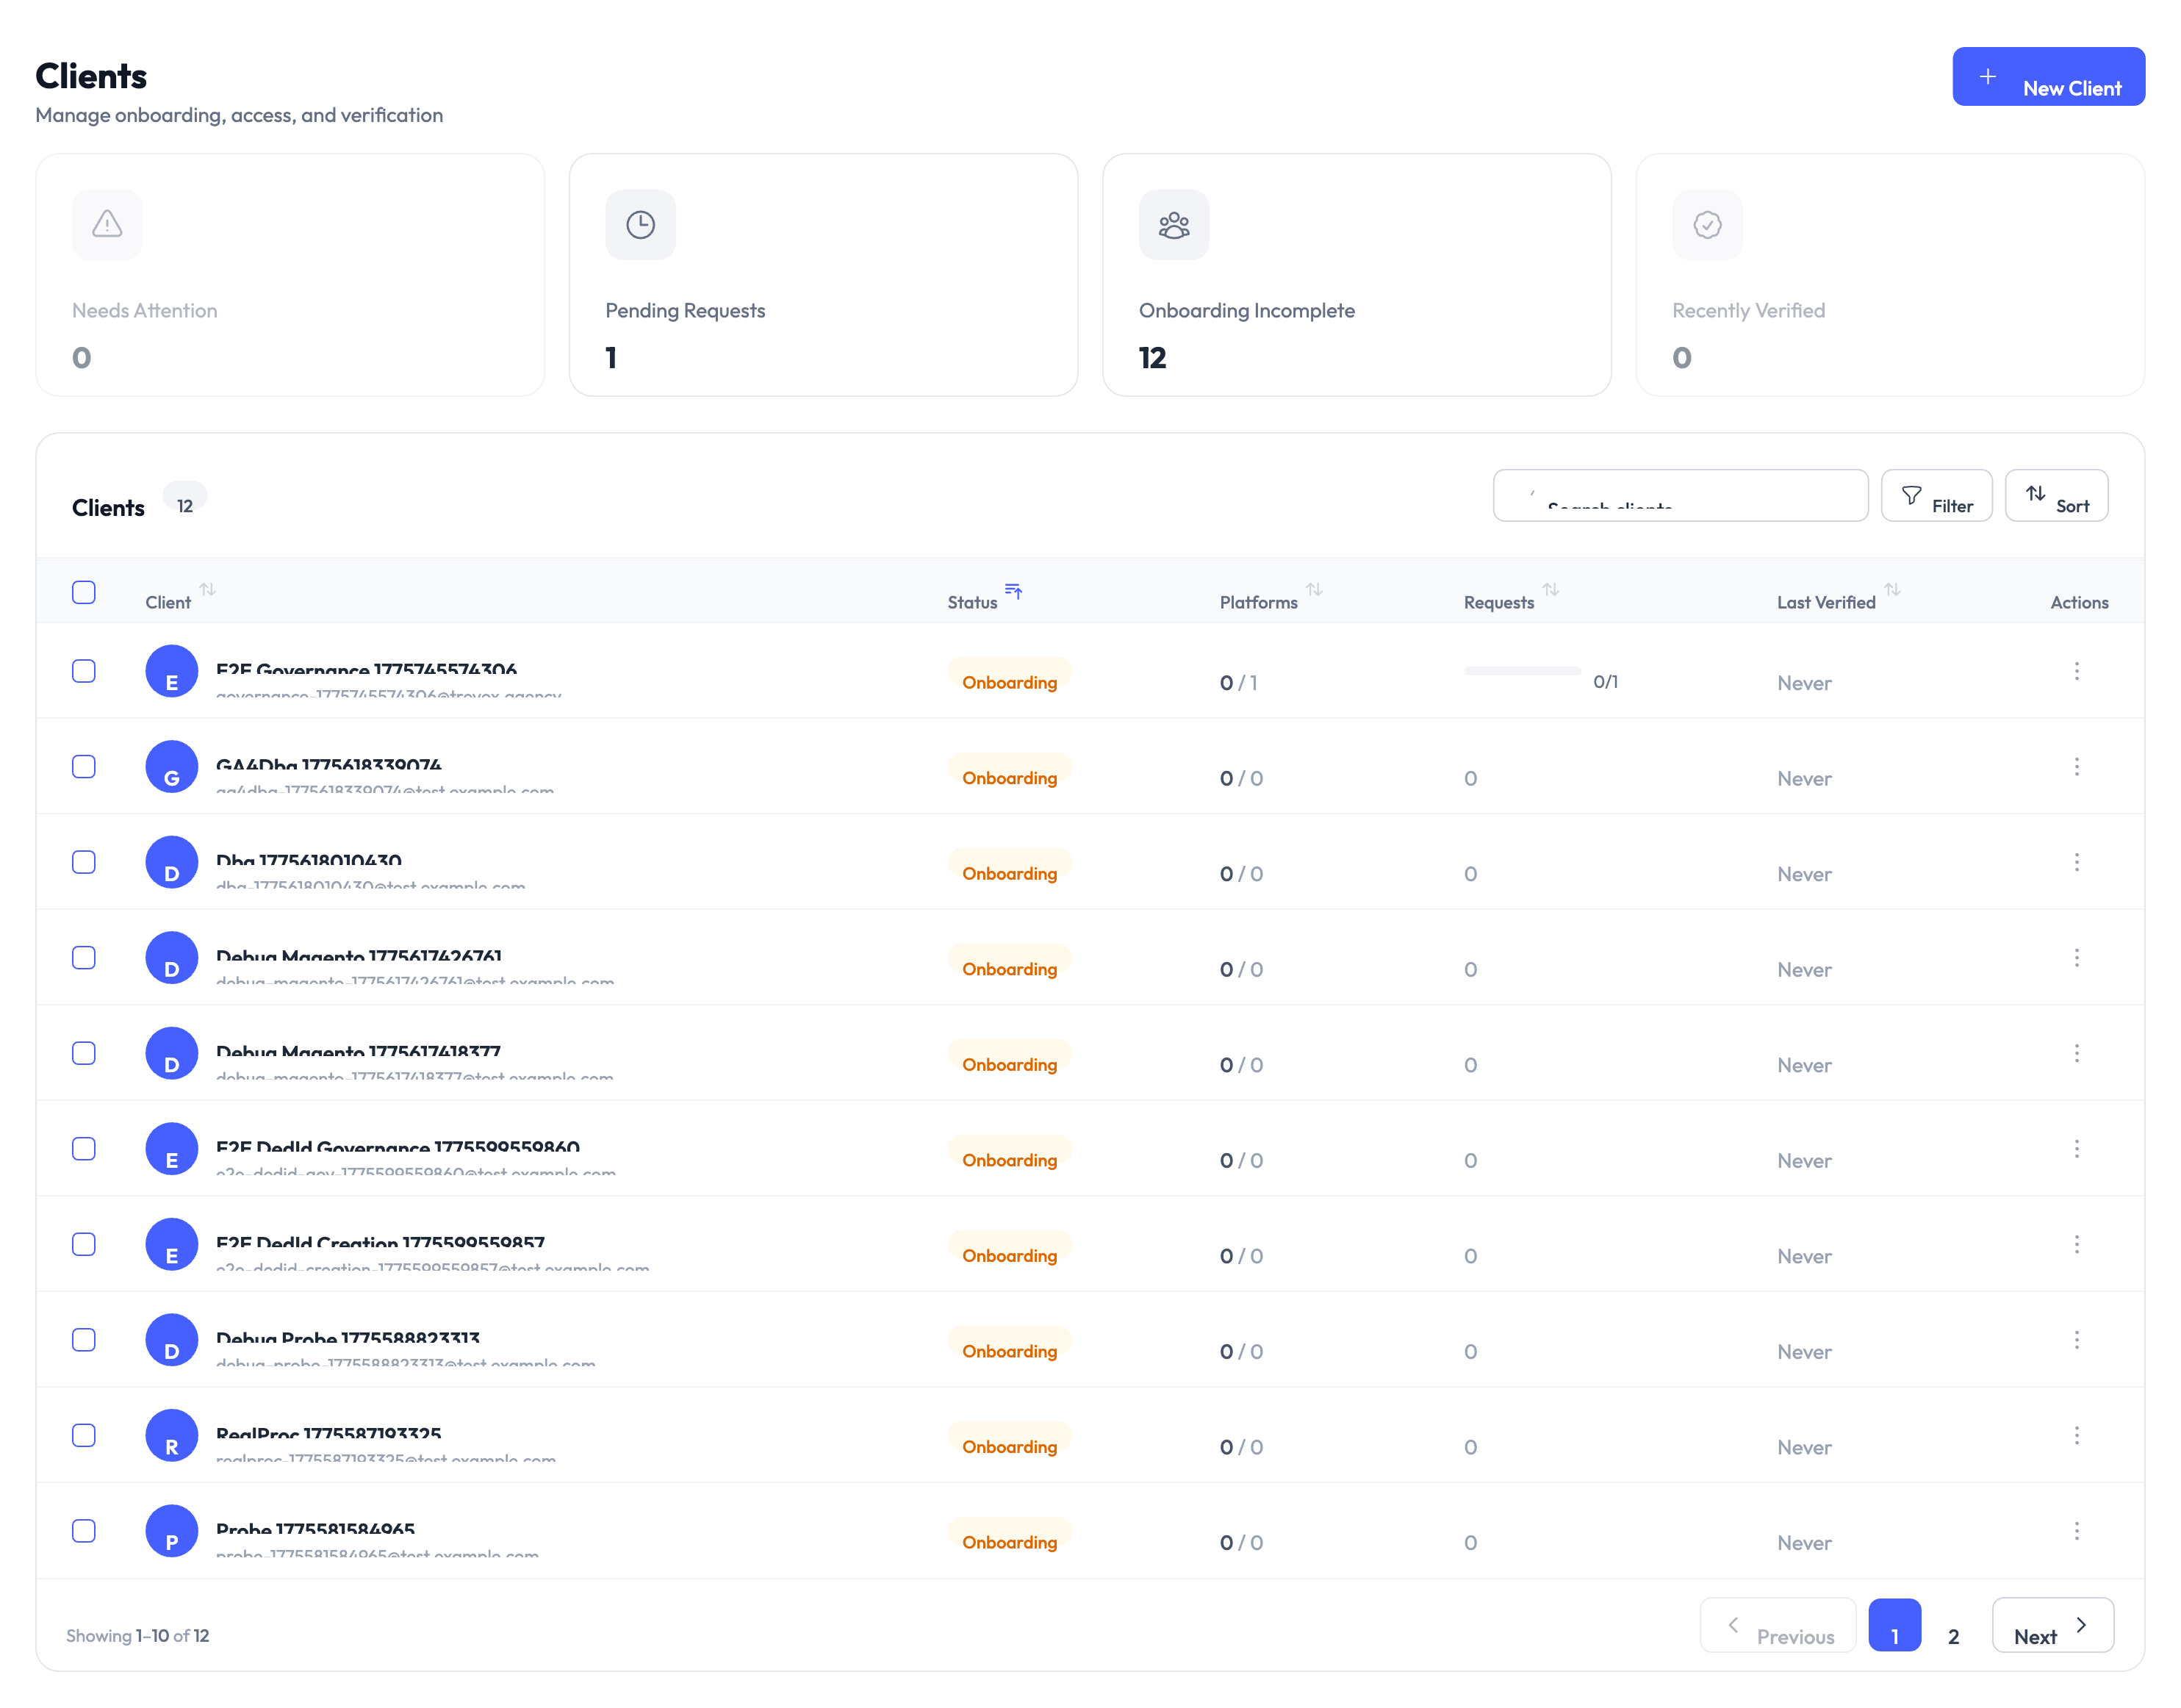
Navigate to Clients and click New Client. The creation flow walks through five steps.
Step 2 – Enter basic information
Provide the client name, description, and industry classification. The name appears throughout AccessHive wherever this client is referenced.
Step 3 – Set region and timezone
Choose the client’s primary region and timezone. These settings affect scheduling rules and compliance requirements.
Step 4 – Choose a security policy
Select a security policy or accept the agency default. The security policy controls password requirements, session length, and multi-factor authentication (MFA) enforcement for this client’s access.
The default security policy works well for most clients. You can adjust it later from the client detail page if the client has specific compliance requirements.
Step 5 – Add contacts and assign a team
Add technical and business contacts for the client. These contacts receive notifications and are used for escalation.
Then assign agency team members who will manage this client account. Each team member’s role determines their level of access to the client’s resources.
Click Create to finish. The client appears in your active clients list.
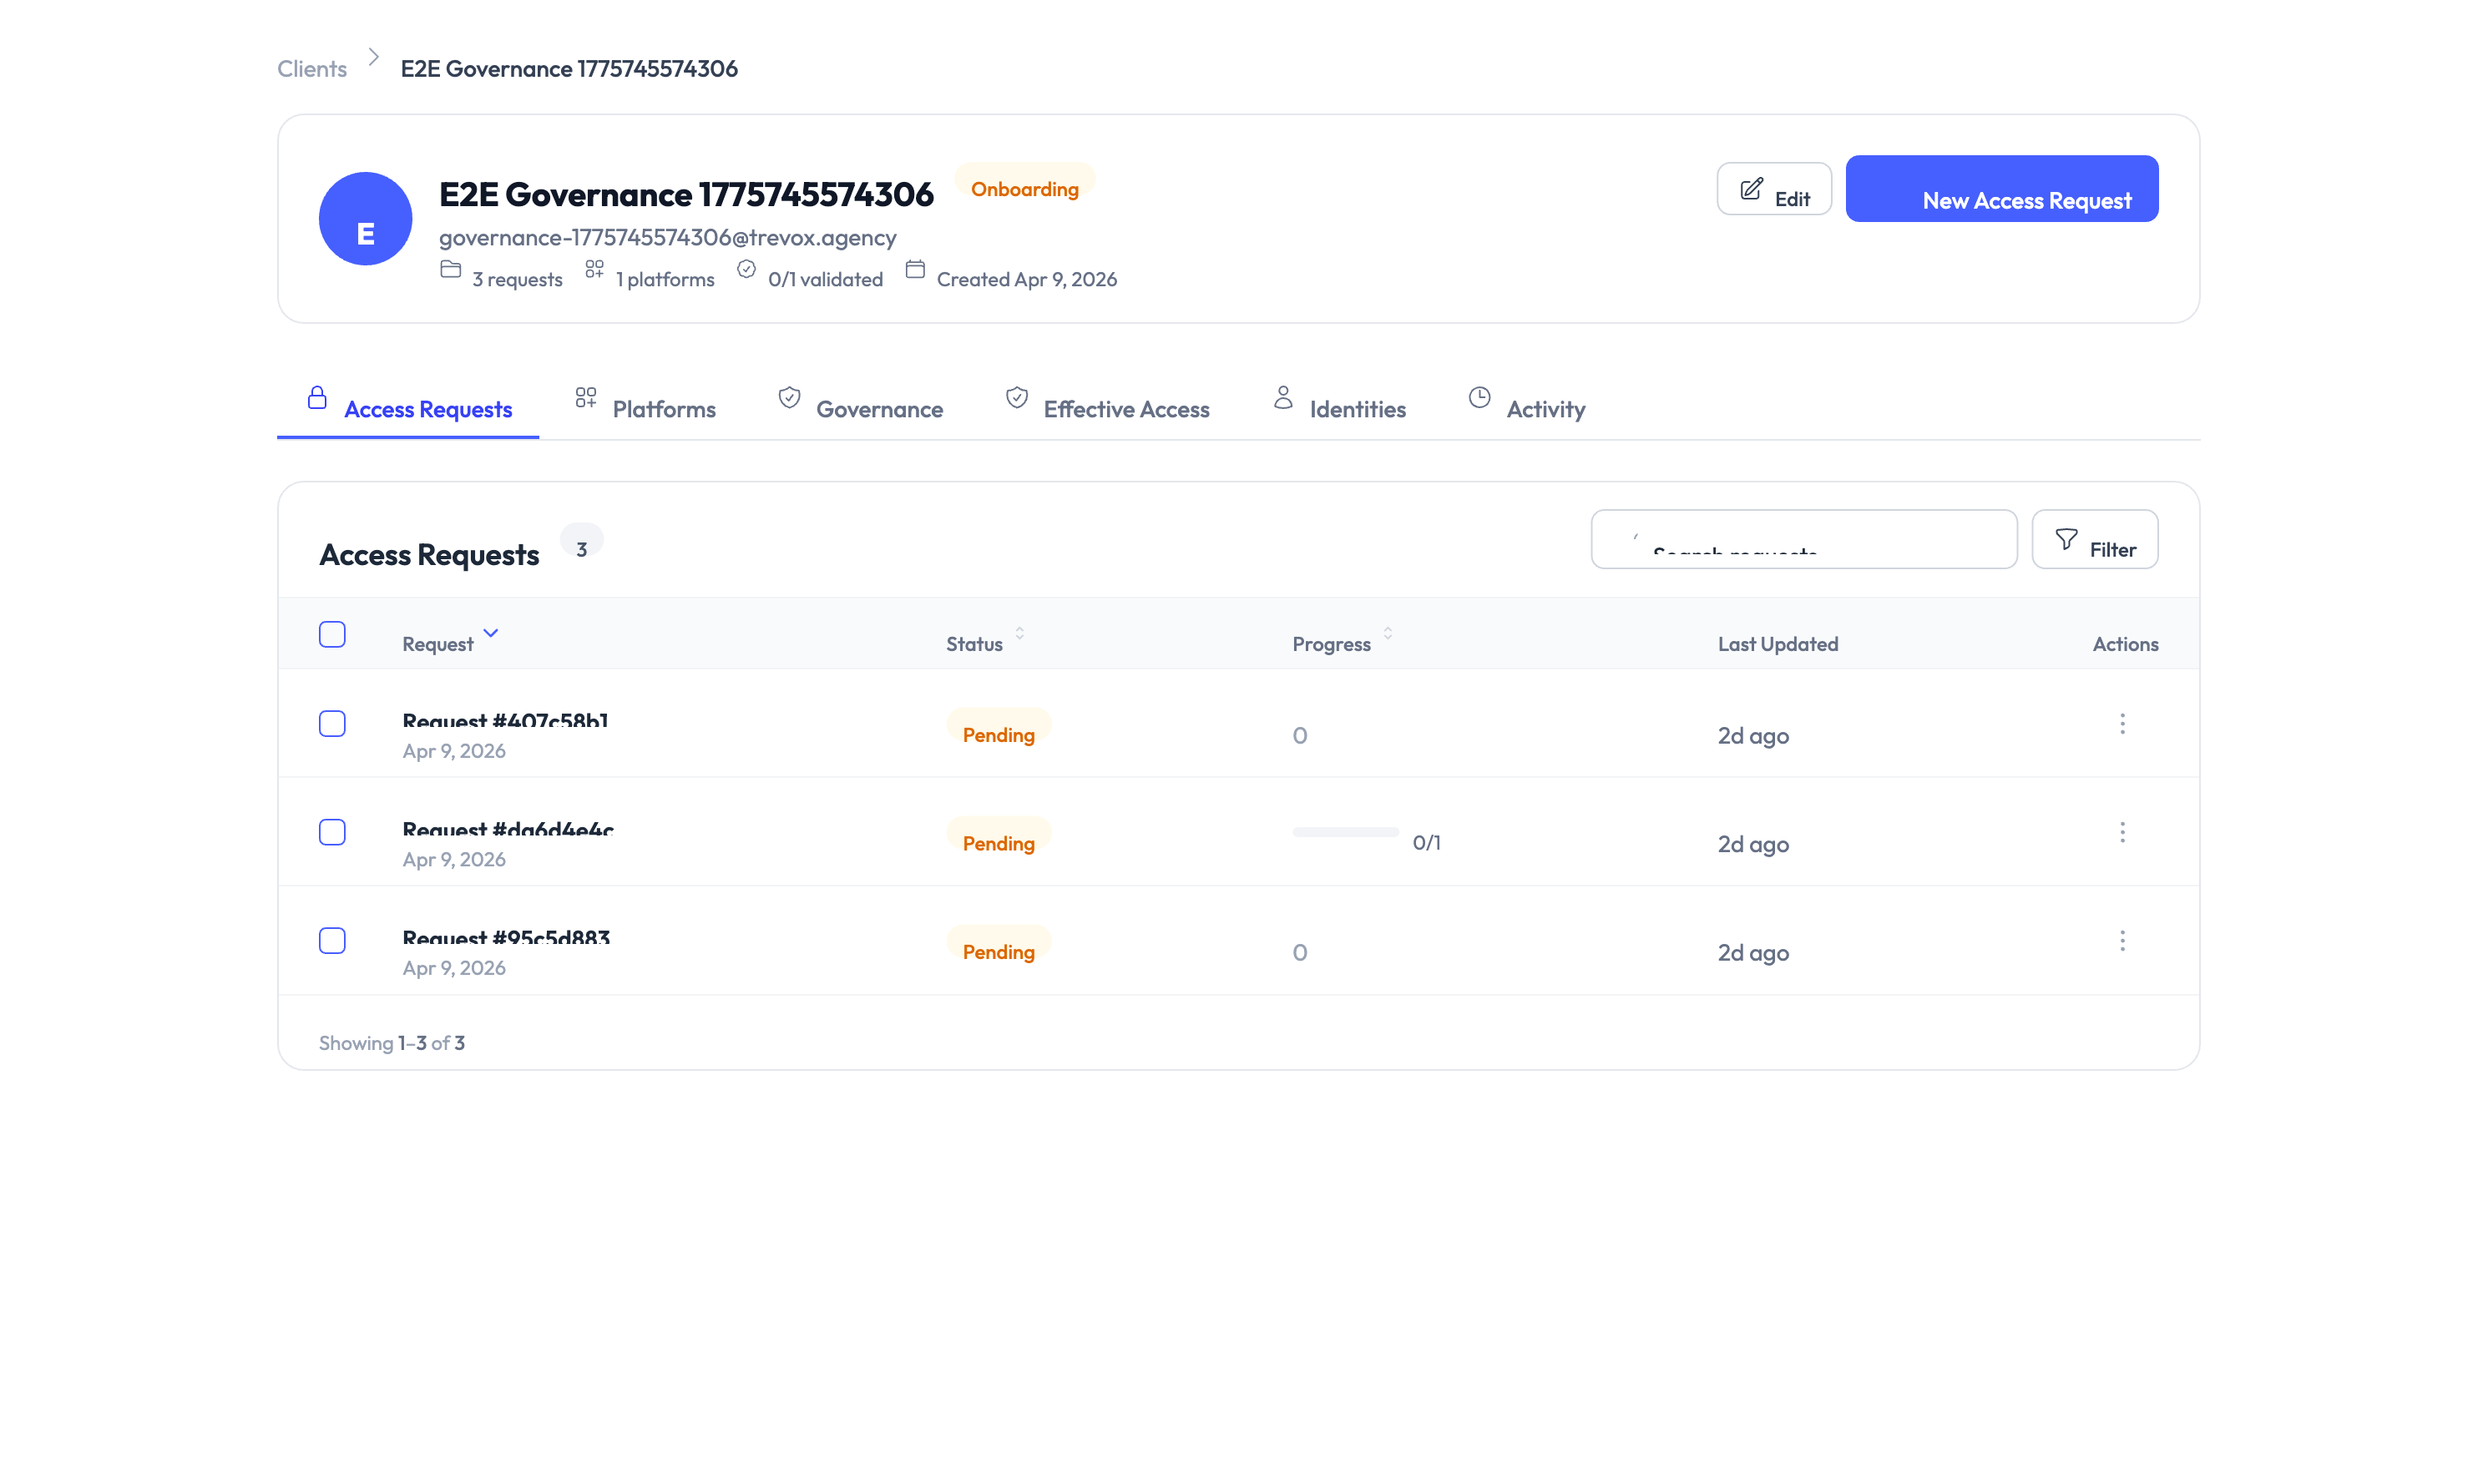
Navigating the client detail page
After creating a client, the detail page organizes everything into tabs.
| Tab | What it shows |
|---|---|
| Access Requests | Access requests for this client, filterable by status (pending, approved, denied, expired) |
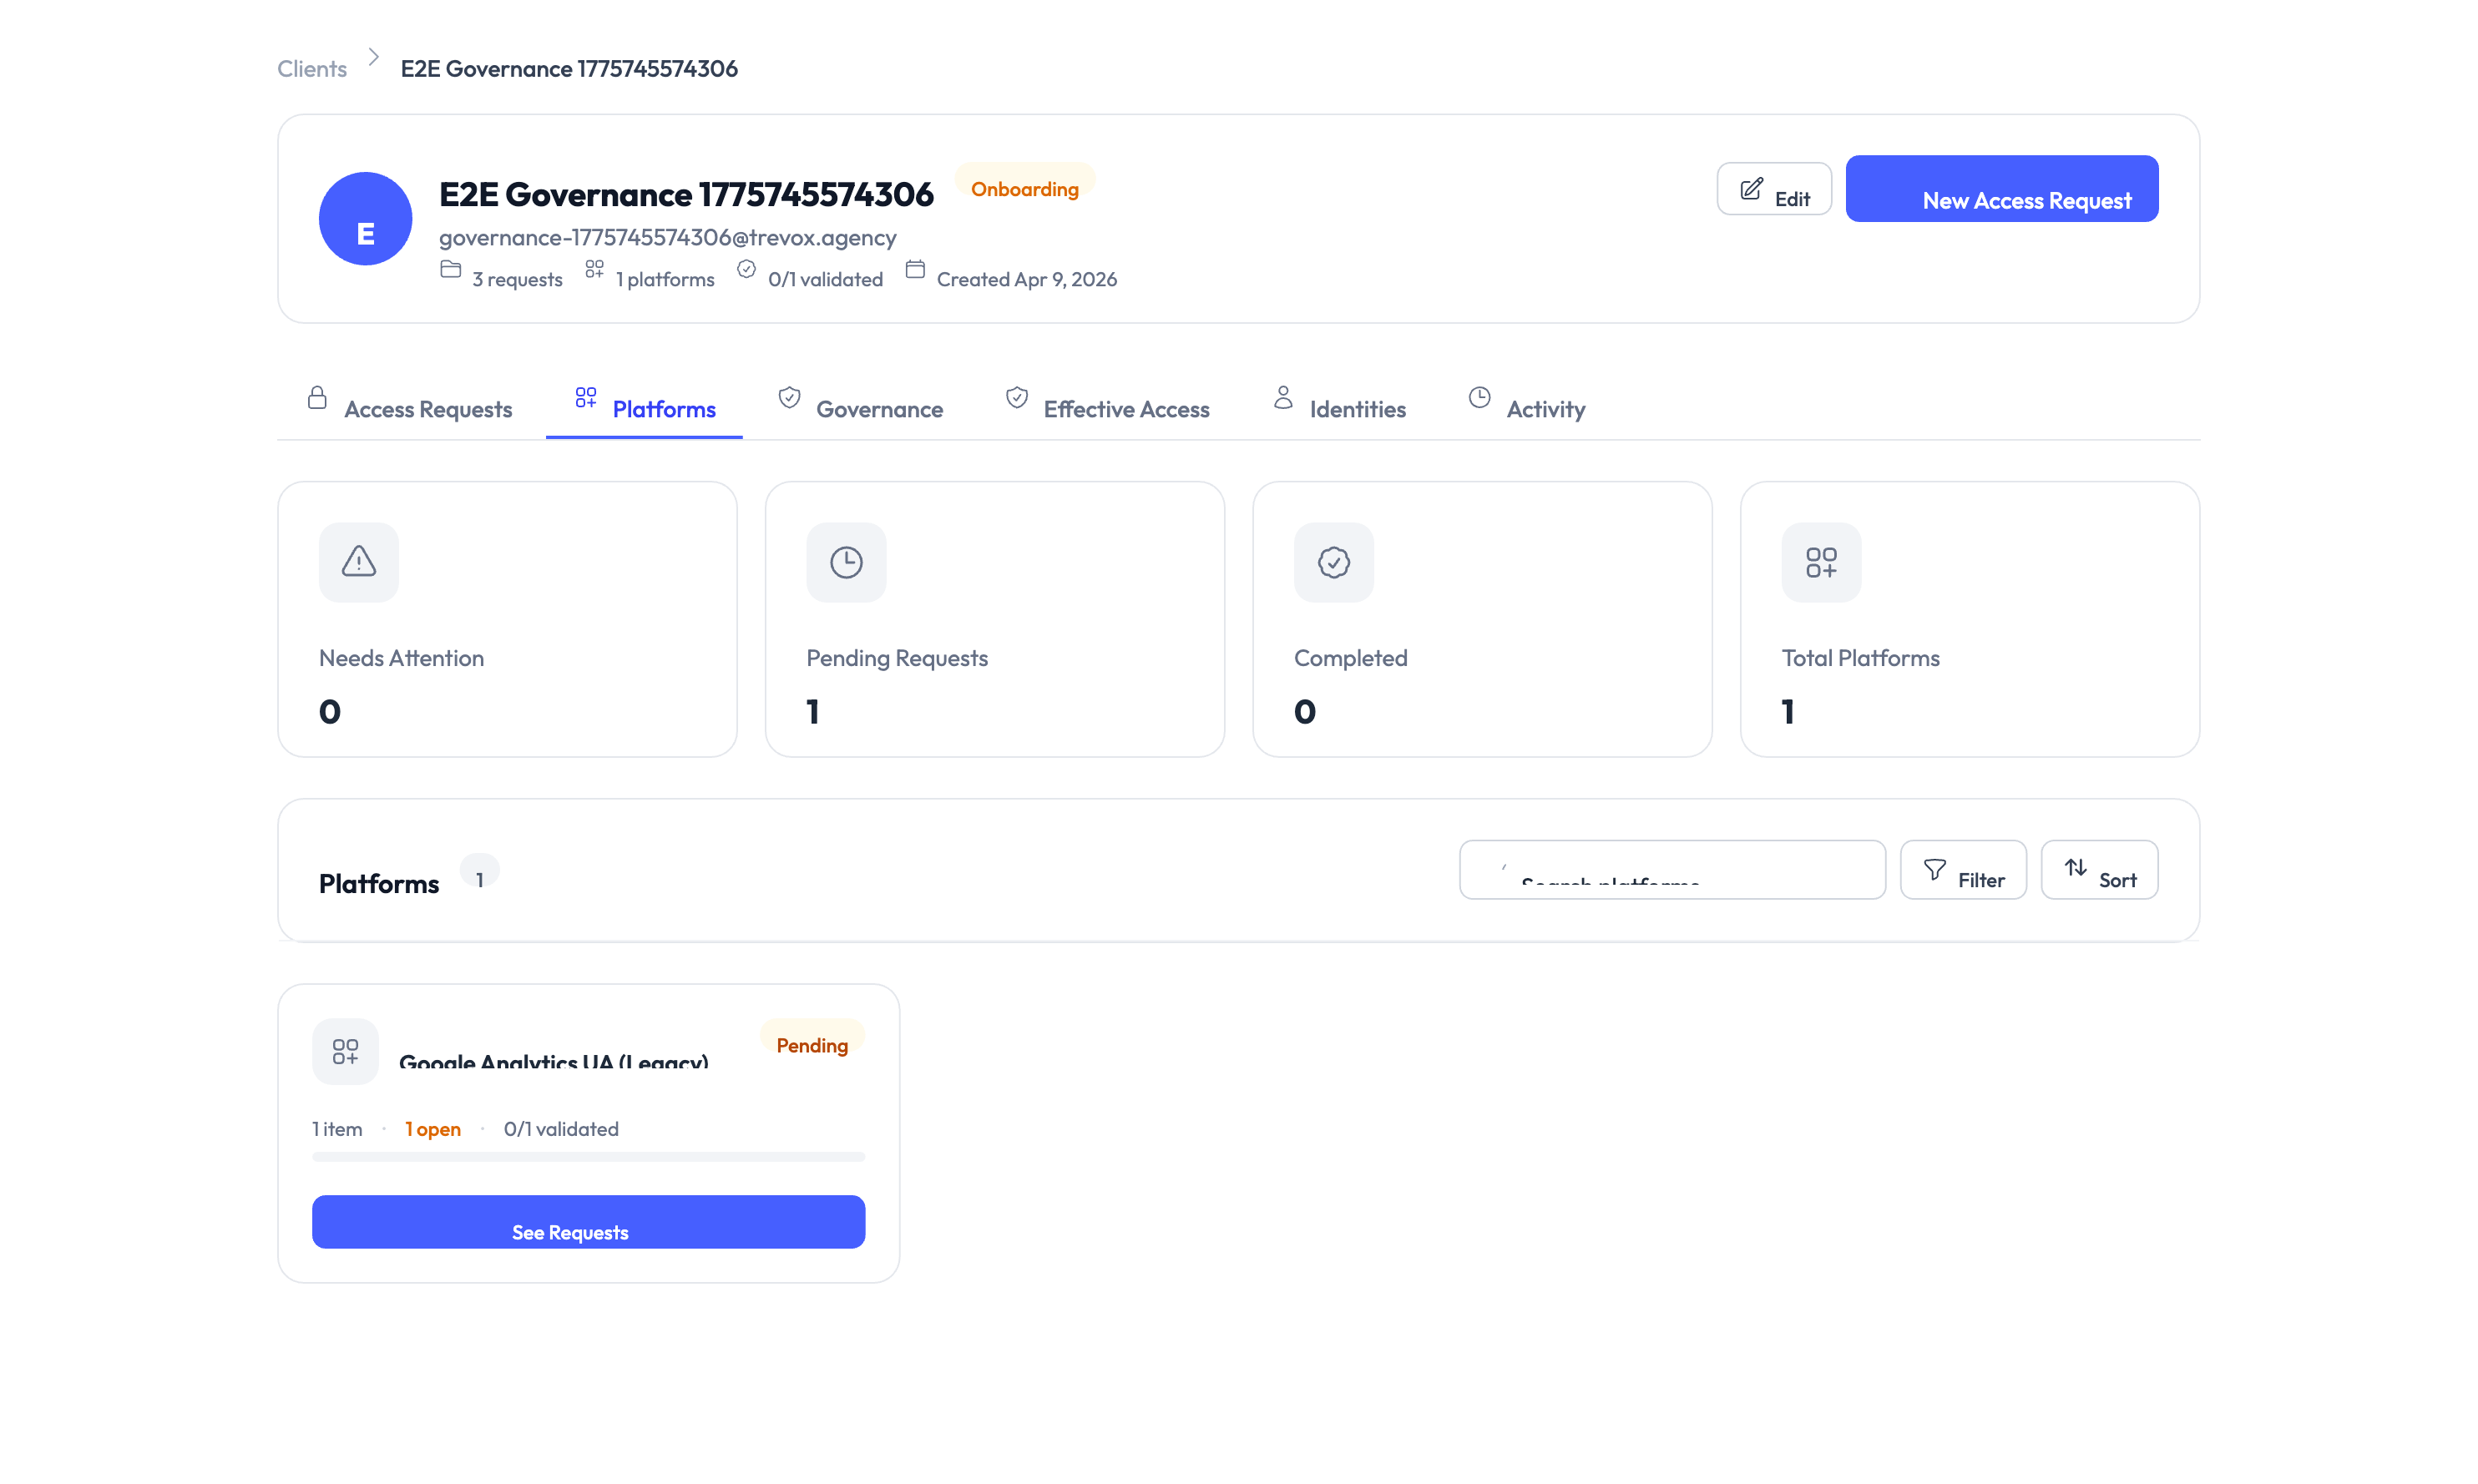
| Platforms | Which platforms are configured for this client, with provisioning status per platform |
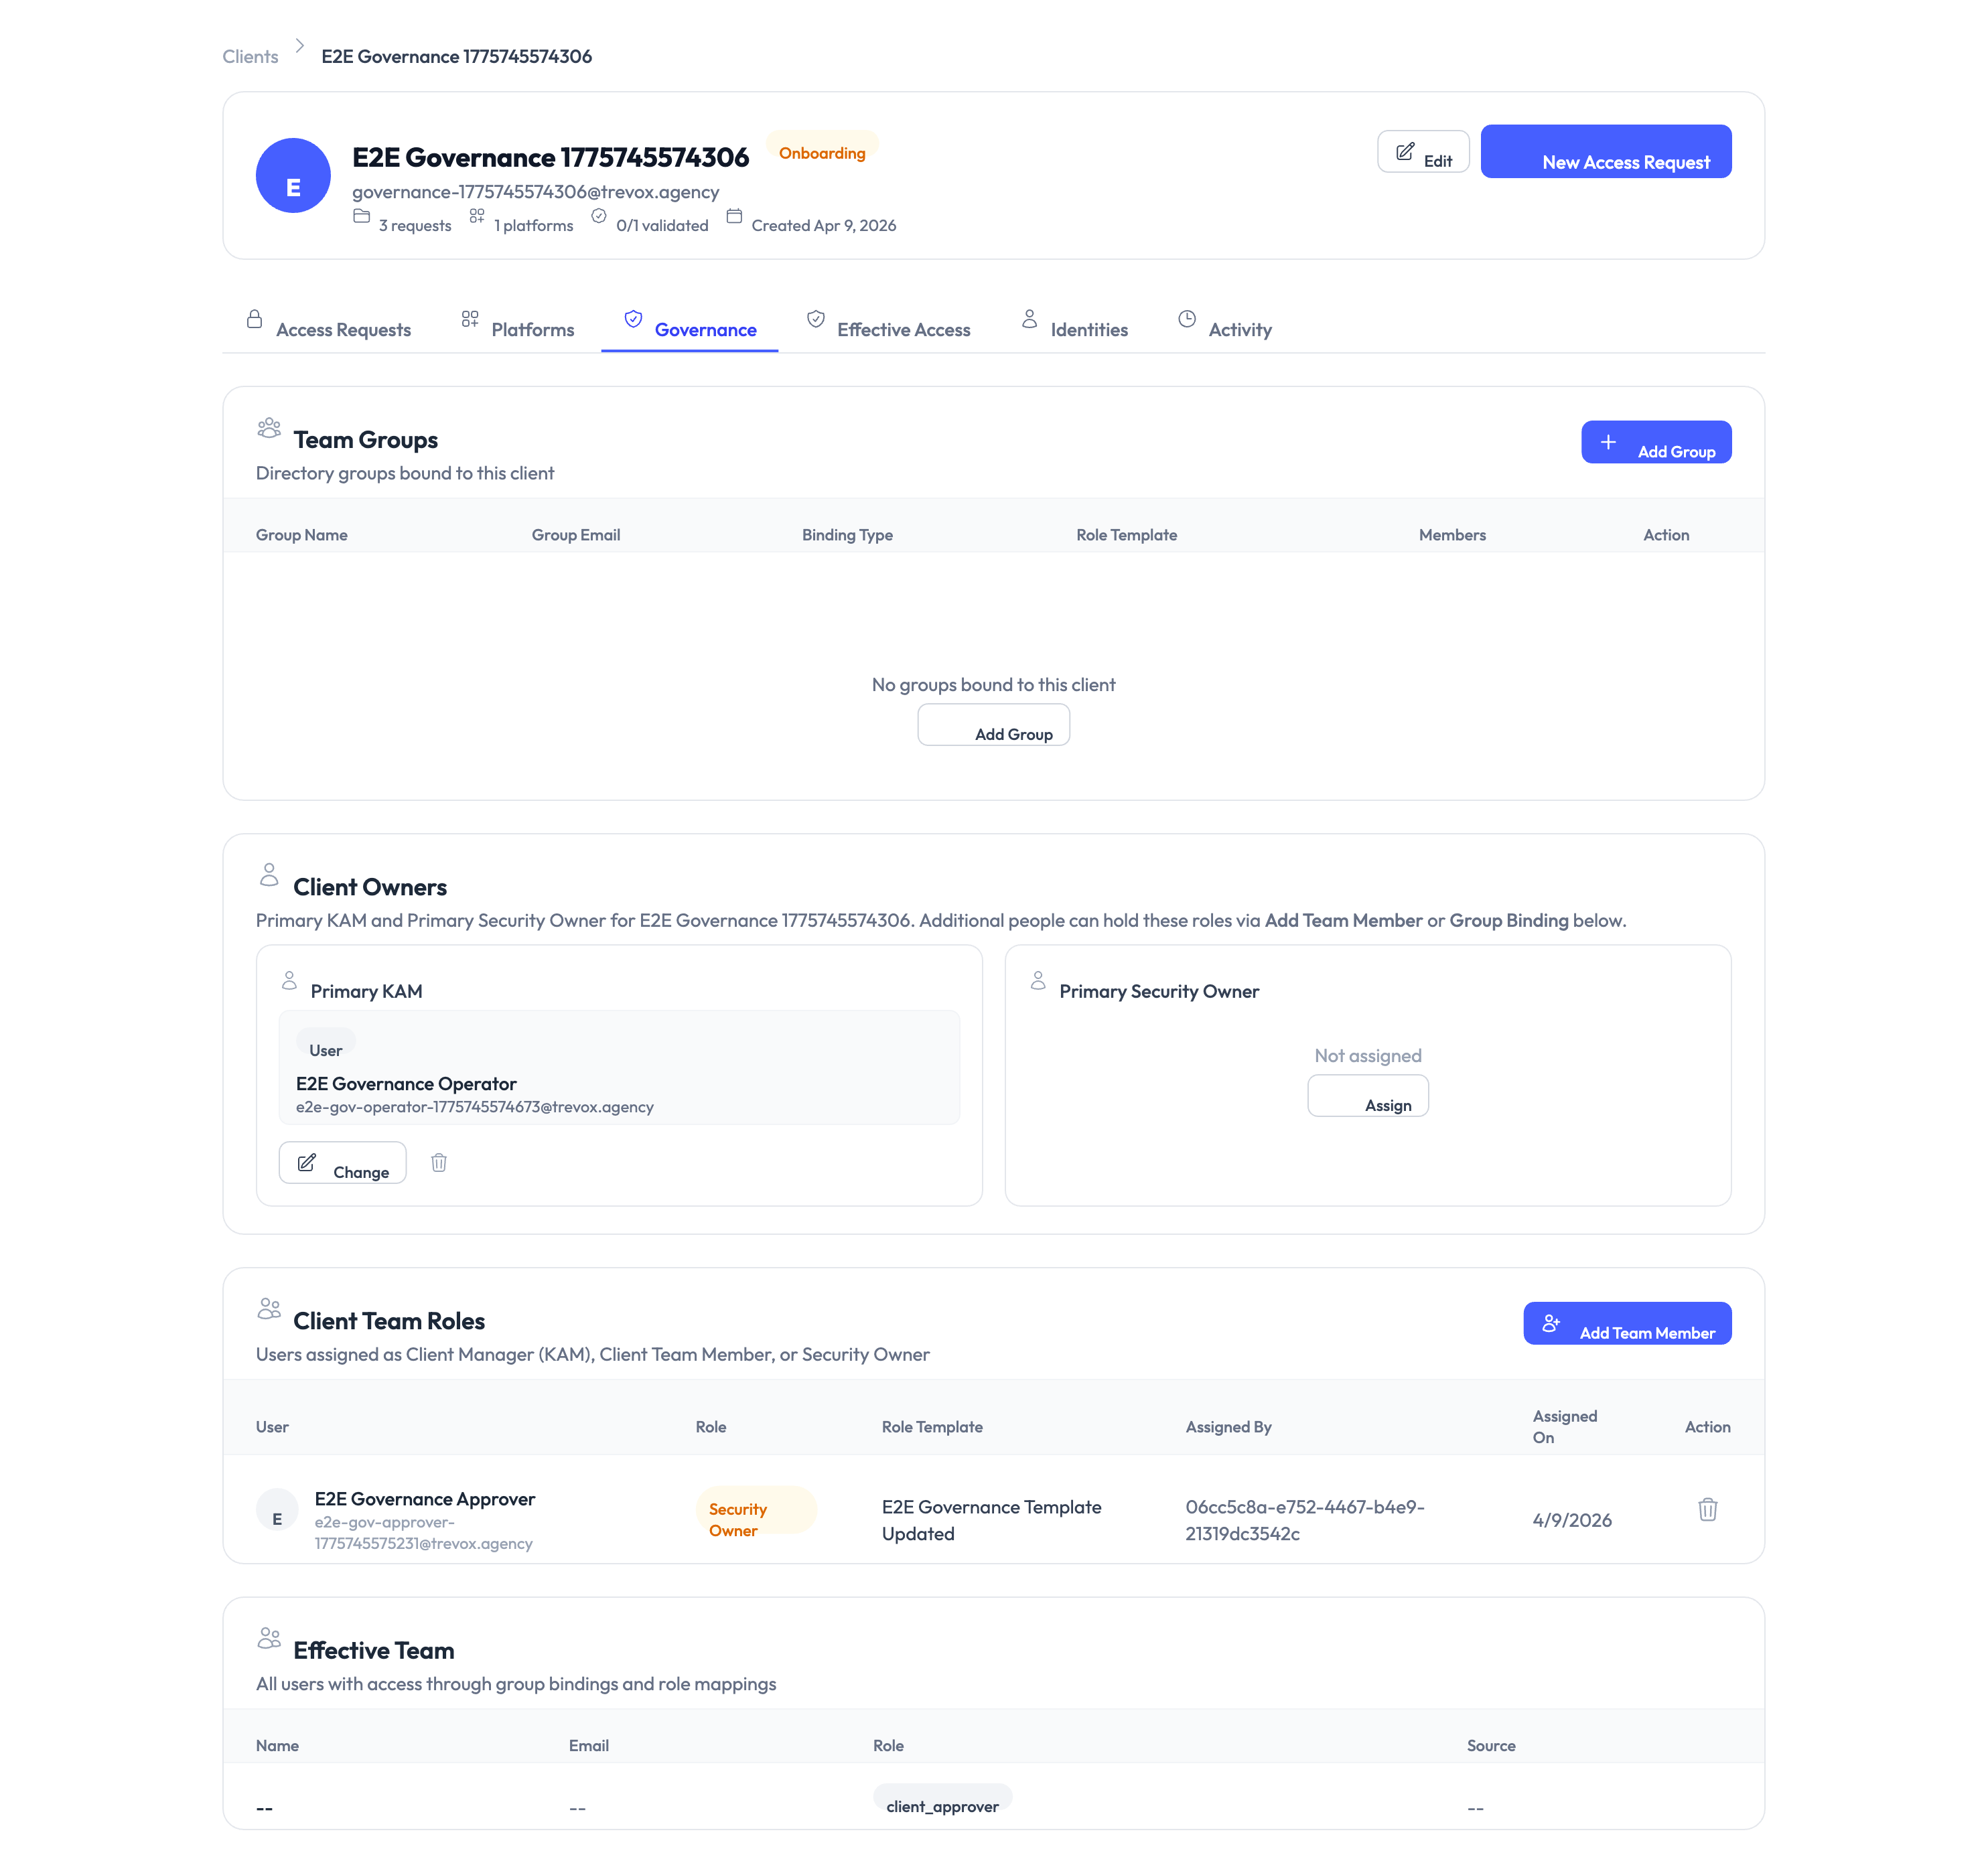
| Governance | Policy assignments, team groups, client owners, and compliance settings |
| Effective Access | Matrix view of what this client can access across all platforms, with access derivation tracing |
| Identities | Client-dedicated identities and their credential status |
| Activity | Audit trail of all changes, including access grants, configuration changes, and identity operations |

Understanding client status
The client dashboard shows one of three operational states:
| Status | What it means |
|---|---|
| Healthy | All access items are operational with no issues |
| Onboarding | Client setup is in progress with checklist items remaining |
| Needs Attention | Issues require admin action, such as expired access or failed provisioning |
Offboarding a client
When you need to revoke all access and archive a client account, use the offboarding flow.
Step 1 – Start the offboard process
Navigate to the client detail page, open the Actions menu, and select Offboard.

Step 2 – Review active access
The system displays all active access items and identities that will be affected. Review this list carefully – every item shown will be revoked.
Step 3 – Confirm and archive
Confirm the action. All access is revoked, dedicated identities are deactivated, and the client moves to an archived state. Archived clients no longer appear in the active clients list.
Offboarding revokes all client access and deactivates their dedicated identities. This action cannot be undone. Make sure all stakeholders are notified before you proceed.
Something went wrong?
Client is stuck in Onboarding status
The onboarding checklist may have incomplete items. Open the client detail page and check the Overview tab for any remaining setup steps. Complete each item to move the client to Healthy status. See Troubleshooting.
Cannot assign a platform to a client
The platform may not be in Operational state. Go to Settings > Platforms and verify the platform is connected and fully configured. See Platform Connections.
Team member cannot see a client’s identities
The team member may not have the right role. Check their assignment on the client’s Team tab and verify they have a role that includes identity access. See Troubleshooting.
What’s next?
- Create identities for the client – Set up dedicated credentials for the client’s platform access. See Creating Identities.
- Configure access requests – Define what roles and permissions the client can request. See Access Requests.
- Set up governance policies – Control approval workflows, access duration limits, and audit requirements. See Governance.
- Review the audit trail – Track all changes and access events for the client. See Audit Trail.