Time-Bound Access
This guide walks you through configuring time-bound access policies in AccessHive. Time-bound access lets you restrict when identities can be checked out, set expiration rules, and automatically renew or revoke access on a schedule.
Time to complete: About 5 minutes.
- You need the Admin role.
- At least one identity must exist. See Creating Identities.
- Familiarize yourself with checkout governance. See PAM Sessions.
Navigate to Settings > Time-Bound Access to open the configuration page.
What is time-bound access?
Time-bound access controls limit identity usage to specific windows. Instead of granting always-on access, you define schedules and expiration rules so credentials are only available when needed. This reduces risk by ensuring unused access is automatically revoked.
For a deeper look at how governance policies work across AccessHive, see Governance.
Configure the default schedule
Step 1 — Set active days
Select the days of the week when access is allowed. Each day appears as a toggle button. Selected days are highlighted in blue.
For example, to allow access only on weekdays, select Mon through Fri and leave Sat and Sun deselected.
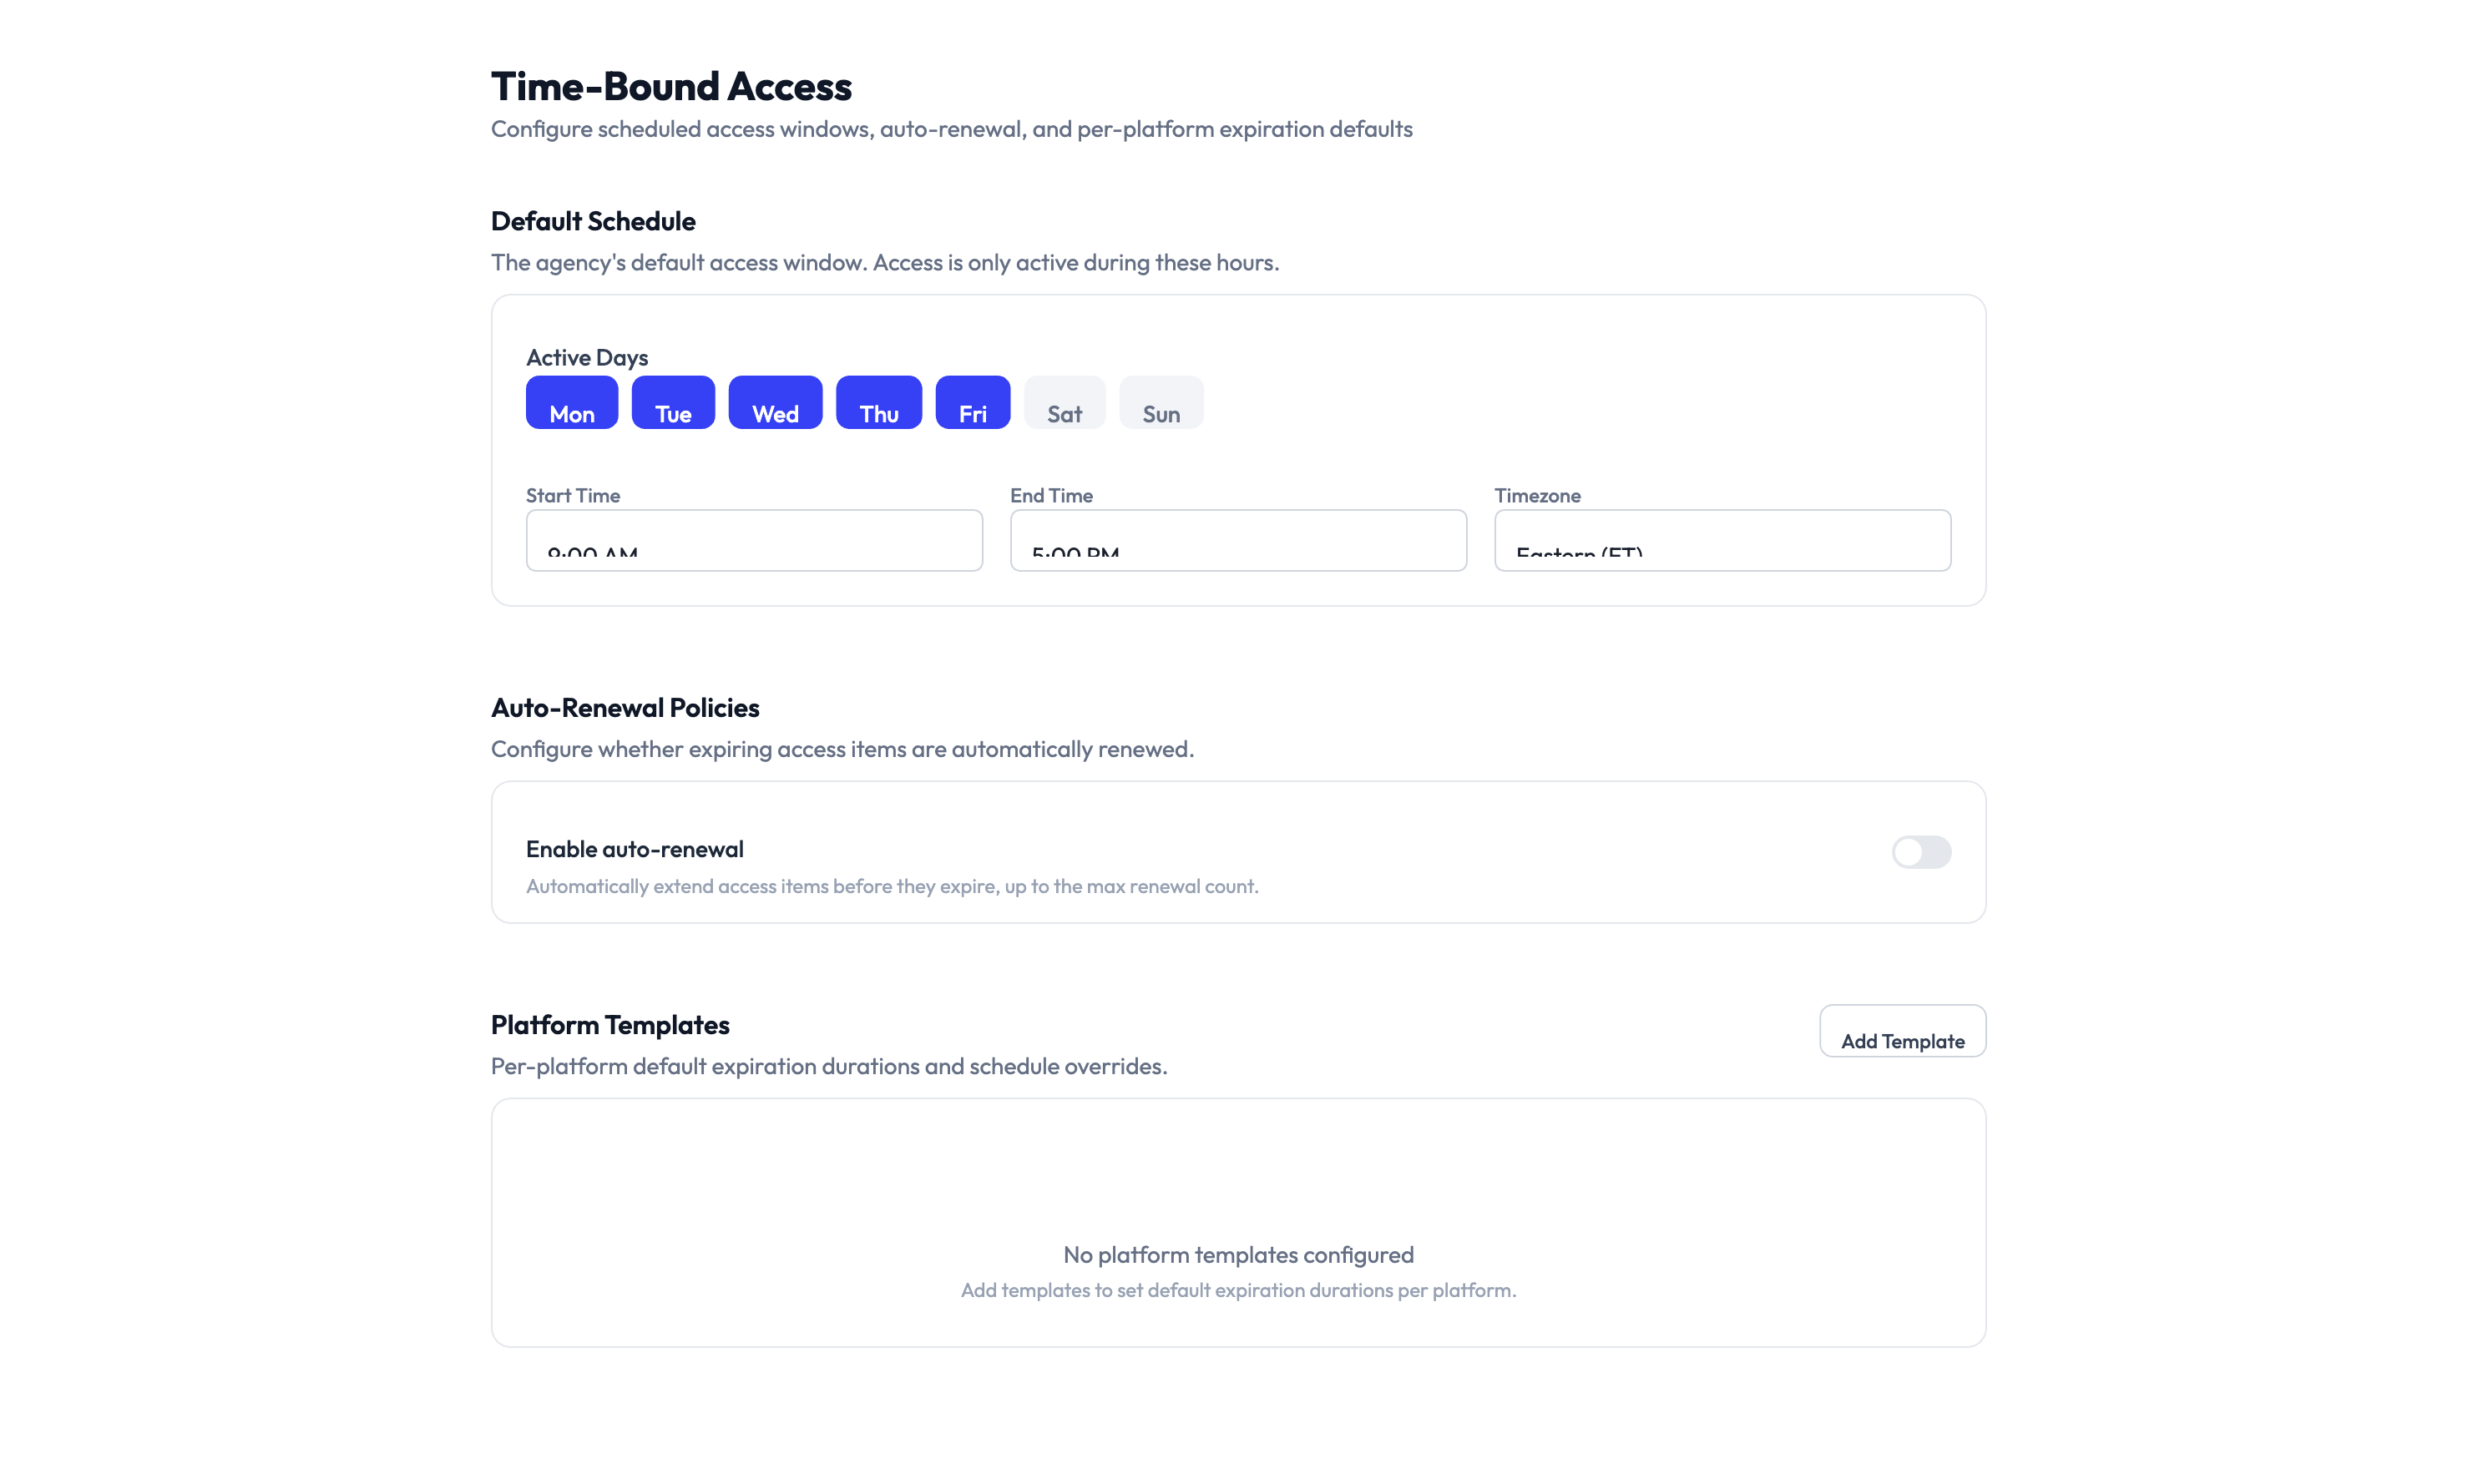
Step 2 — Set active hours
Use the Start Time and End Time fields to define the daily access window. Set the Timezone to match your team’s working hours.
For example, setting 9:00 AM to 5:00 PM in US Eastern means identities can only be checked out during business hours in that timezone.
If you select all seven days and set the time window to 12:00 AM - 11:59 PM, time-bound restrictions are effectively disabled. This is useful if you only want expiration-based controls without daily scheduling.
Set up auto-renewal policies
The Auto-Renewal Policies section controls what happens when an access grant is about to expire.
Step 3 — Enable auto-renewal
Turn on the Enable auto-renewal toggle to let the system automatically extend access before it expires, up to a maximum number of renewals.
When auto-renewal is enabled, the system extends expiring access grants so users do not lose access mid-task. If auto-renewal is disabled, access expires at the scheduled time and the user must request a new checkout.
The system caps the number of consecutive auto-renewals. Once the limit is reached, the user must submit a new access request. This prevents indefinitely extended sessions.
Create platform templates
Platform templates let you override the default schedule for specific platforms. For example, you might allow 24/7 access for API-based platforms but restrict human-operated logins to business hours.
Step 4 — Add a platform template
Click Add Template in the Platform Templates section. Select the platform you want to customize and configure its own schedule and expiration settings. The platform template takes priority over the default schedule for identities on that platform.
Until you add a template, all platforms follow the default schedule. You only need templates when a platform requires different access hours or expiration rules.
Step 5 — Save your changes
Click Save Changes at the bottom of the page. The new schedule and policies take effect immediately for all future checkout requests.
Something went wrong?
Access is blocked outside of scheduled hours but I need emergency access
The time-bound schedule enforces the window strictly. To grant emergency access, an Admin can temporarily adjust the schedule on this settings page, or use an override in the access request workflow. See Access Requests.
Auto-renewal is enabled but access still expired
Auto-renewal has a maximum number of consecutive renewals. Once that limit is reached, the system stops renewing. The user needs to submit a new checkout request. Check the renewal limit in the Auto-Renewal Policies section.
Platform template is not overriding the default schedule
Make sure the template is saved and assigned to the correct platform. Go to Settings > Time-Bound Access > Platform Templates and verify the platform name matches. See Troubleshooting.
What’s next?
- Configure checkout policies — Set approval workflows and session time limits. See PAM Sessions.
- Set up auto-remediation — Automatically respond to policy violations like expired access. See Auto-Remediation.
- Review the audit trail — Track when access was granted, renewed, and revoked. See Audit Trail.
- Manage access requests — Learn how users request and receive time-bound access. See Access Requests.