JML Automation
This guide walks you through configuring Joiner-Mover-Leaver (JML) automation in AccessHive. JML automation adjusts access automatically when team members join your agency, change roles, or leave – so you do not have to manually provision or revoke access for every personnel change.
Time to complete: About 10 minutes for initial setup.
- You need the Admin or Owner role to configure JML automation.
- At least one identity source must be connected and set as the Source of Truth. See Google Workspace Setup or Identity Sources.
- Role templates should be created for your common job functions. See Role Templates.
Navigate to Settings > JML Automation to open the configuration page.
How JML automation works
JML automation monitors your connected identity sources (such as Google Workspace or a local directory) for changes in user status and group membership. When the system detects a change, it applies the matching automation policy automatically.
The three lifecycle events are:
| Event | What triggers it | What the system does |
|---|---|---|
| Joiner | A new user appears in the identity source | Assigns a role template, provisions platform access, and notifies admins |
| Mover | A user’s group membership changes | Revokes the old role template, applies the new one, and reconciles permissions |
| Leaver | A user is deactivated or removed | Revokes all access, rotates shared credentials they used, and notifies the security team |
Setting the Source of Truth
Before configuring automation policies, you must designate which identity source drives the lifecycle events. Only one source can be active at a time.
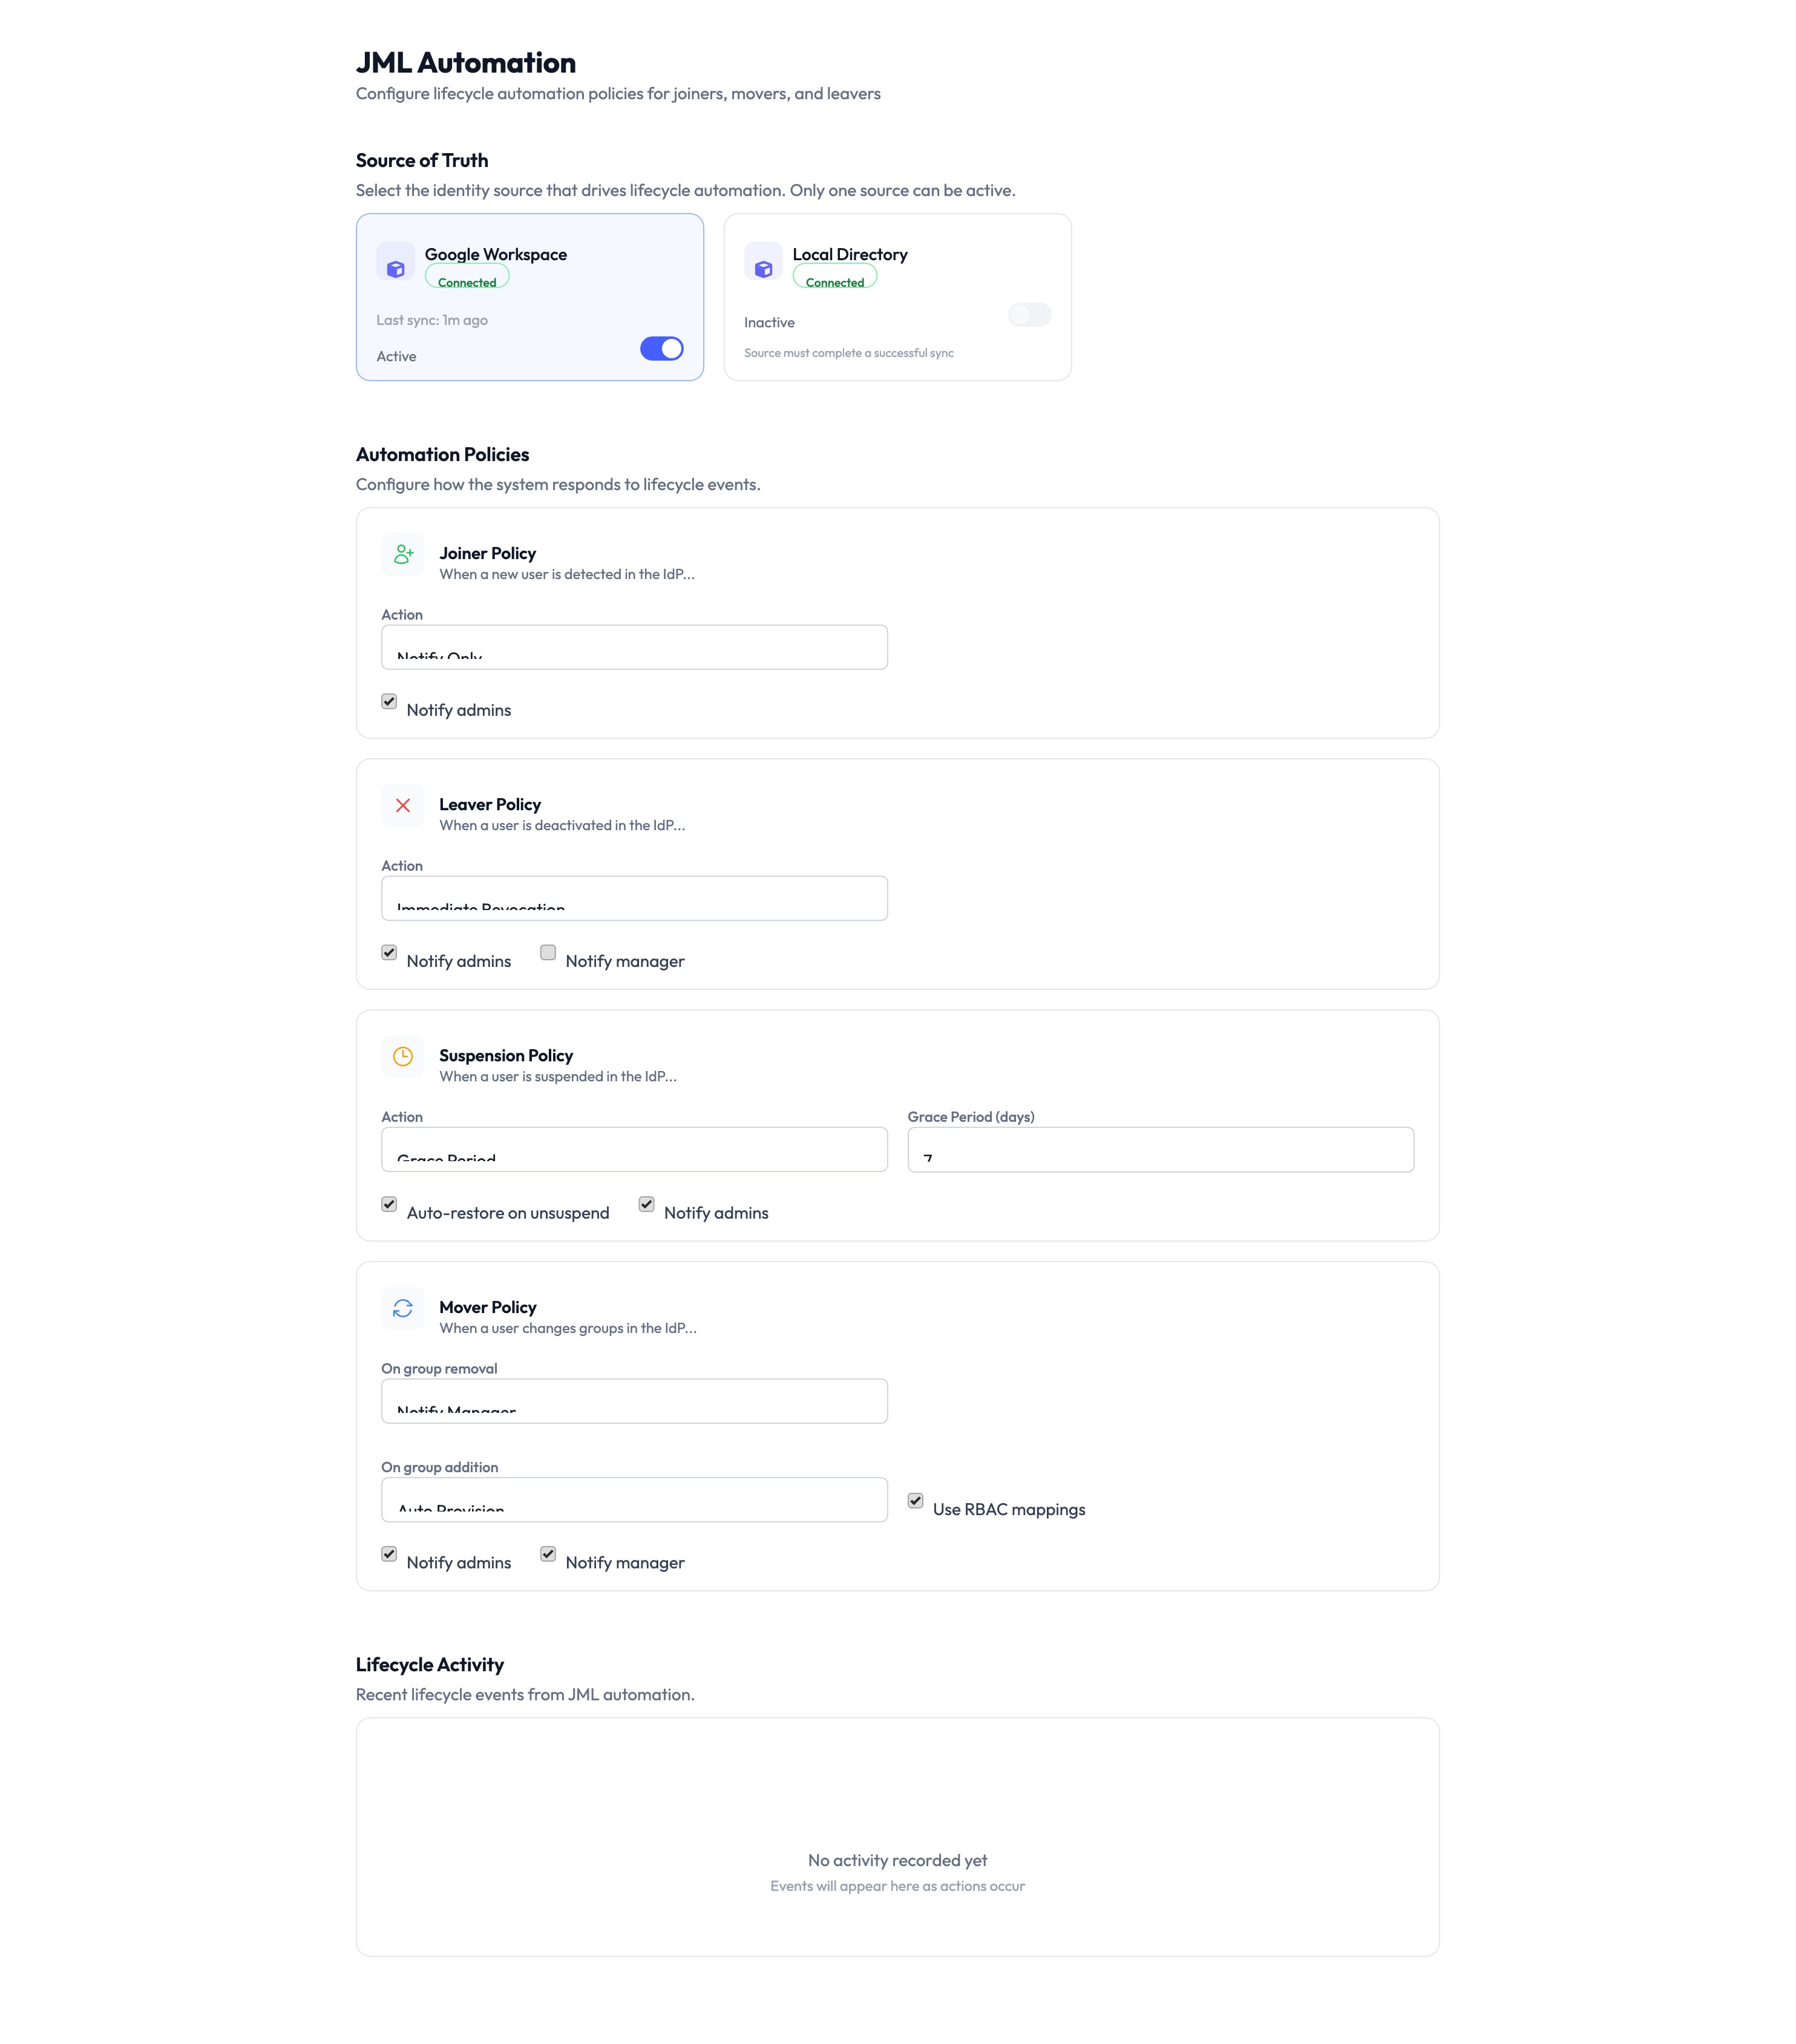
On the JML Automation page, the Source of Truth section shows your connected identity sources. Toggle the source you want to use:
- Google Workspace – Recommended if your agency manages users in Google Workspace. User and group changes sync automatically.
- Local Directory – Use this if you manage users directly in AccessHive without an external directory.
Enabling one source as the Source of Truth disables the other. Make sure all your users are in the selected source before switching.
Configuring automation policies
Each lifecycle event has its own policy card. Configure them to match your agency’s onboarding and offboarding processes.
Joiner Policy
The Joiner Policy controls what happens when a new user is added to your identity source.
- Expand the Joiner Policy card.
- Set the role template that new users receive by default.
- Choose notification preferences – toggle Notify admins and Notify manager to control who is alerted when a new user is provisioned.
Leaver Policy
The Leaver Policy controls what happens when a user is deactivated or removed.
- Expand the Leaver Policy card.
- Set the grace period – how long after deactivation before all access is revoked. A short grace period (such as a few hours) gives you time to handle any handover.
- Choose notification preferences – toggle Notify admins and Notify manager.
A departing user’s access is a security risk. Set the grace period to the minimum time needed for an orderly handover – hours, not days.
Suspension Policy
The Suspension Policy handles temporary deactivation, such as when an employee goes on extended leave.
- Expand the Suspension Policy card.
- Configure the Reactivation Period – how long a suspended user has before their access is permanently revoked instead of just paused.
- Toggle Auto-restore on reactivation to control whether access is automatically restored when the user is reactivated in the identity source.
- Choose notification preferences – toggle Notify admins and Notify manager.
Mover Policy
The Mover Policy controls what happens when a user changes groups in your identity source.
- Expand the Mover Policy card.
- Map source groups to role templates – when a user moves from one group to another, the system revokes the old template and applies the new one.
- Toggle Use RBAC mappings to use your existing role-based access control mappings for automatic permission reconciliation.
- Choose notification preferences – toggle Notify admins and Notify manager.
Lifecycle Activity log
The bottom of the JML Automation page shows the Lifecycle Activity log – a record of all automated actions taken by JML policies. Use this log to verify that automation is working as expected and to investigate any unexpected access changes.
Each entry shows the event type (Joiner, Mover, Leaver, or Suspension), the affected user, the action taken, and the timestamp.
Something went wrong?
A new user was not automatically provisioned
Verify that the Joiner Policy is configured and that the Source of Truth is set to the identity source where the user was added. Also check that the user was added to a group that maps to a role template. See Troubleshooting.
A departing user still has access after leaving
Check the grace period in your Leaver Policy. If the grace period has not elapsed, access has not been revoked yet. Also verify that the user was actually deactivated or removed in the Source of Truth – JML automation only triggers when the identity source reports the change. See Troubleshooting.
Mover Policy did not update a user’s permissions
Confirm that the user’s group change is reflected in the identity source. Then check that the old and new groups are both mapped to role templates. If the new group does not have a mapping, the system has nothing to apply. See Role Templates and Troubleshooting.
Lifecycle Activity log shows no events
If no events appear, the Source of Truth may not be syncing. Go to Settings > Identity Sources and verify the connection status. A disconnected or degraded identity source cannot send lifecycle events to JML automation. See Troubleshooting.
For more troubleshooting scenarios, see the full Troubleshooting Guide.
What’s next?
- Create role templates – Define the permission bundles that JML automation assigns. See Role Templates.
- Connect your identity source – Set up the directory that drives lifecycle events. See Google Workspace Setup or Identity Sources.
- Configure Single Sign-On – Pair JML with SSO so access and authentication are managed together. See Single Sign-On.
- Review the audit trail – Monitor automated provisioning and revocation actions. See Audit Trail.